



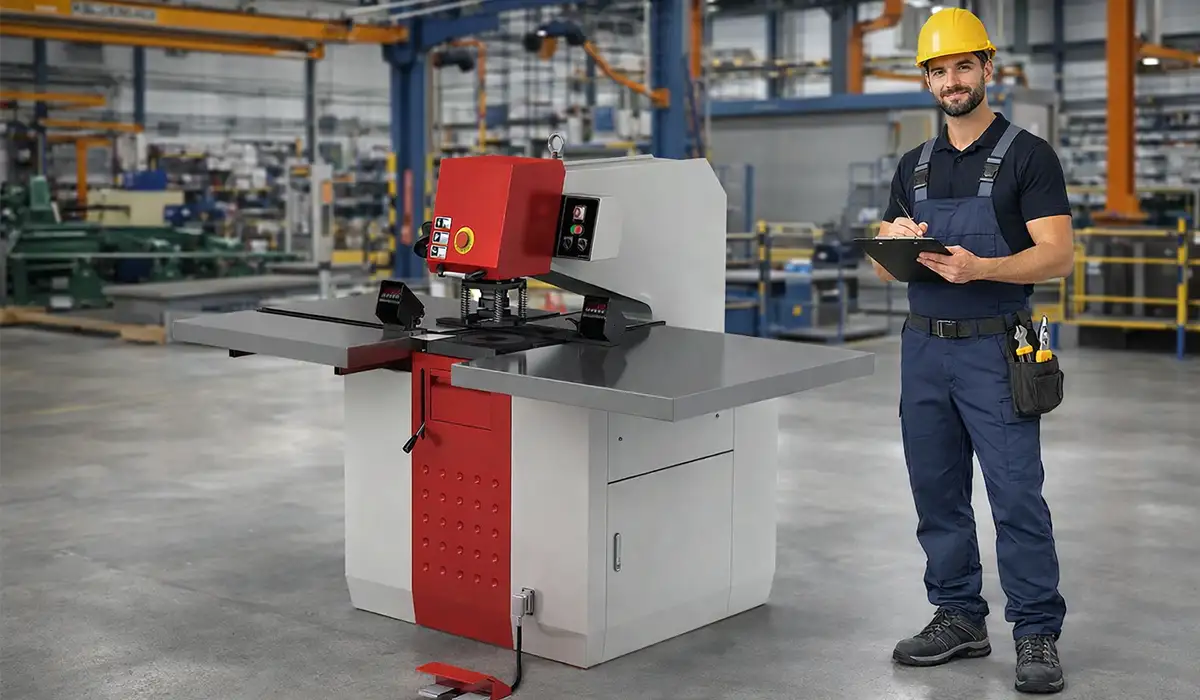





Why Punching Machine Maintenance and Safety Matter (And Why Troubleshooting Can’t Wait)
Prioritizing punching machine maintenance and safety is a fundamental requirement for any fabrication shop. A well-maintained press operates with precision, whereas a neglected machine often produces defective parts. Regular upkeep reduces the likelihood of catastrophic failure, ensuring that production schedules remain uninterrupted and reliable.
Safety is inextricably linked to machine health. When components like clutch brakes or hydraulic seals wear out, the risk of operator injury increases significantly. Implementing a punching machine maintenance guide helps identify these risks before they escalate into dangerous situations.
The difference between preventive maintenance vs emergency repairs is often visible on the bottom line. Planned downtime for service is predictable and budget-friendly. Conversely, emergency fixes are expensive and often occur during peak production times, causing severe disruption.
Finally, adherence to maintenance schedules extends the total lifecycle of your assets. Industrial punching presses are significant capital investments. keeping them in optimal condition through disciplined care ensures they deliver value for decades rather than just years.
For a comprehensive understanding of Metal Punching and Notching Machines: Types, Applications, and Selection Guide, we highly recommend reviewing this article.
The Importance of Routine Checks and Preventive Care
Establishing a routine for punch press preventive maintenance transforms unpredictable breakdowns into managed events. Operators should log every inspection, noting wear patterns on moving parts. This historical data helps technicians predict component life, allowing for replacements during scheduled outages rather than mid-shift failures. Consistent care ensures the machinery runs within its specified tolerances.
Daily Punching Machine Maintenance Tasks
Daily inspections are the first line of defense against downtime. Operators must follow a specific punching machine maintenance checklist at the start of every shift. This process begins with a visual scan of the machine exterior, looking for loose bolts, debris, or oil leaks that occurred overnight.
Cleaning is not just aesthetic; it is functional. Metal shavings and slugs can accumulate in the die area, causing misalignment or jamming. Clearing this debris prevents damage to the workpiece and the sensitive internal components of the turret or ram assembly.
Lubrication is equally critical for longevity. Operators must check oil reservoirs and grease points daily. Without adequate lubrication, high-speed friction destroys bearings and guides rapidly. Automated lubrication systems for punch presses should also be verified for flow and pressure.
Comparing operator maintenance vs technician maintenance, daily tasks fall squarely on the operator. These quick checks do not require deep technical knowledge but demand consistency. They bridge the gap between major service intervals performed by certified engineers.
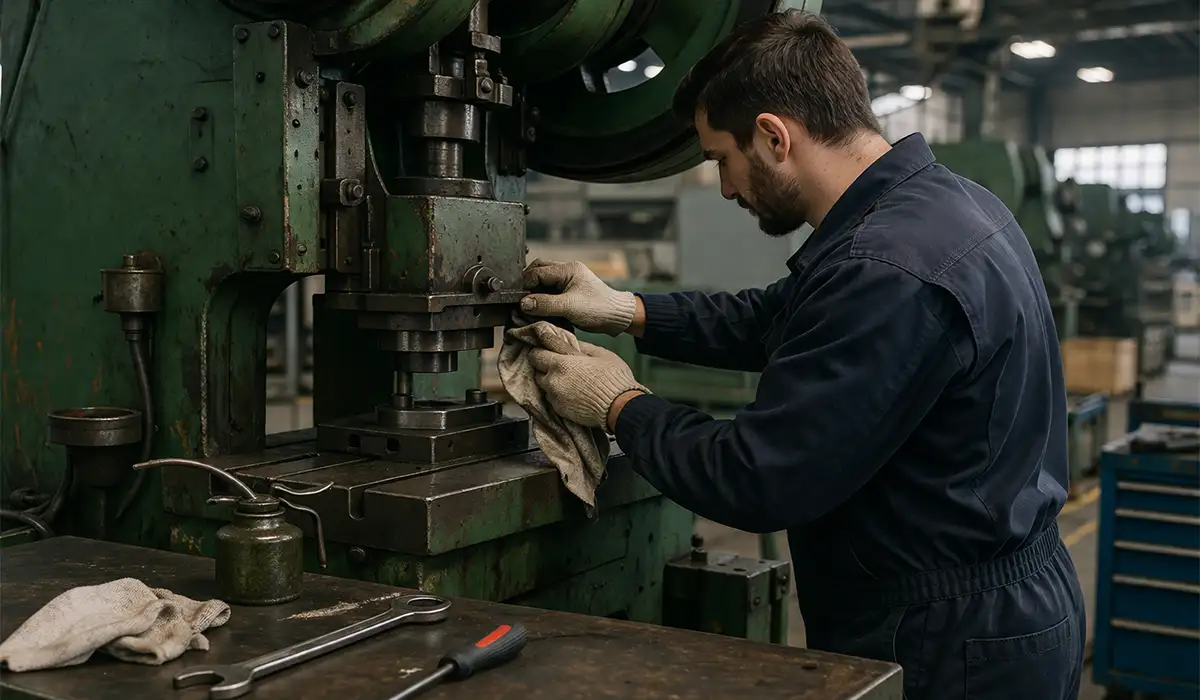
Cleaning, Lubrication, and Tool Inspection
Dirt is the enemy of precision. Wipe down the X and Y axis rails to remove grit that could scour the surfaces. Simultaneously, inspect the punch press tooling and safety mechanisms. Ensure that the auto-lube system is dispensing oil correctly to the ram and guides. If the lubrication system fails, the machine can seize within hours.
Hydraulic and Electrical System Checks
Check the hydraulic fluid temperature and level immediately. Overheating fluid indicates a failing cooler or pump stress. Electrically, ensure all control panel lights function and cables are intact. Loose wires in a high-vibration environment can cause intermittent faults. Hydraulic press maintenance requires vigilance, as leaks create both slip hazards and fire risks.
If you are looking for more information about industrial control systems used in punch press operations, it is recommended not to miss reading this article.
Safety Protocols for Punch Press Machines
Strict punch press safety procedures save lives. The sheer force exerted by a punching machine can cause severe injury instantly. Therefore, safety features are never optional; they are integral to the machine’s operation. Every operator must respect the boundaries set by light curtains and physical barriers.
Machine guarding is a non-negotiable aspect of industrial punching press safety. Interlocks must stop the ram immediately if a guard is opened. Tampering with these switches is a serious violation. Regular testing ensures these “fail-safe” mechanisms actually fail to a safe state.
For a comprehensive understanding of Bus bar Processing Machines
, we highly recommend reviewing this article.
Modern equipment often contrasts manual punching machine safety vs CNC machine safety. While CNC machines keep operators further from the impact zone, they introduce automated movement hazards. Operators must remain aware of the turret rotation and sheet movement, not just the ram stroke.
Personal Protective Equipment (PPE) serves as the final barrier. Eye protection, hearing protection, and steel-toed boots are standard. However, gloves should be used cautiously; loose fabric can be caught in rotating parts. Adherence to these protocols ensures a secure production environment.
For a comprehensive understanding of Personal Protective Equipment (PPE) standards in industrial settings, we highly recommend reviewing this article.
Machine Guarding and Emergency Stop Systems
Test the emergency stop system daily. When activated, the machine must halt immediately and dump hydraulic pressure. Inspect light curtains for dead zones. If a beam is broken, the punch machine servicing mode should engage, preventing any stroke. Faulty guards are a primary cause of workplace citations and injuries.
Lockout/Tagout Procedures and PPE Requirements
Lockout/tagout safety procedures (LOTO) are mandatory during any internal maintenance. Never reach into the die space without neutralizing energy sources. Regarding PPE, operators must wear impact-resistant glasses to deflect flying metal slugs. Hearing protection is also vital, as the decibel level of punching press operation safety limits is often exceeded.
If you are looking for more information about Lockout/Tagout procedures, it is recommended not to miss reading this article.
Tooling Setup and Maintenance for Punch Press Machines
Proper punch press tooling and safety go hand-in-hand. Dull tools require more tonnage to penetrate the material, stressing the machine frames and the tool itself. Regular sharpening schedules prevent this excessive load and improve edge quality.
Setting up tooling requires focus and precision. A misalignment of just a few thousandths of an inch can shatter a die, creating shrapnel. Operators must clean the turret stations thoroughly before seating new tools to ensure perfect vertical alignment.
Inspect the tool springs and canisters during changeovers. Fatigue in these components can lead to stripping failures, where the punch does not retract from the sheet. This causes crashes when the sheet advances.
Understanding visual inspection vs calibration tools is key. While a visual check spots obvious chips, calibration tools verify the station alignment. Both are necessary for a comprehensive tool maintenance for punch presses strategy.
Safe Tooling Setup and Changing Practices
Safe tooling setup procedures for punching presses involve verifying the die clearance matches the material thickness. Always tighten clamping bolts to the specified torque. When handling heavy tools, use lifting aids to prevent back strain. Never force a tool into a station; resistance indicates a problem that needs investigation, not force.
Die and Tool Inspection Best Practices
Check for tool wear in punching presses using a magnifying glass. Look for galling (adhesion of material) on the punch tips. Die maintenance and safety depend on sharp edges; a rounded edge creates burrs and increases stripping force. Regularly stone the die surfaces to remove minor imperfections and maintain a flat surface.
For a comprehensive understanding of punching and notching machine components and their role in tooling performance, we highly recommend reviewing this article.
Preventive Maintenance Schedules: What to Check and When
A robust punching machine maintenance program relies on three time-based layers. Daily tasks (cleaning, lubrication, visual checks) catch 80% of early failure signals — worn tool springs, oil leaks, loose bolts — before they cascade. Weekly inspections (hydraulic levels, electrical function, tooling wear) verify that the daily discipline is working. Quarterly or biannual deep-dives (gib clearance, drive belt tension, bearing inspection, alignment verification) catch slow-creeping issues that daily checks can’t detect.
Documentation is the linchpin. A logbook of press machine inspection logs helps technicians trace recurring issues. If a specific station keeps jamming or a particular die keeps shattering, the log reveals patterns that point to a systemic issue (turret misalignment, hydraulic pressure drift) rather than random bad luck. That historical data is your best tool for predicting failures before they happen.
This article serves as a valuable resource for those seeking detailed information on predictive and preventive maintenance strategies in industrial environments.
Common Punching Machine Problems and First-Response Troubleshooting
When a punching machine is not working properly or producing quality issues, the fastest diagnosis starts with symptom mapping. The following table links operator-observed symptoms to the most likely root causes — and the first troubleshooting step for each.
| Form | Busbars vs Units | Units vs Each Other | Terminals vs Busbars | Terminals vs Units |
|---|---|---|---|---|
| Form 1 | No separation | No separation | No separation | No separation |
| Form 2a | Separated | No separation | Not separated from busbars | No separation |
| Form 2b | Separated | No separation | Separated from busbars | No separation |
| Form 3a | Separated | Separated | Not separated from busbars | Not separated |
| Form 3b | Separated | Separated | Separated from busbars | Not separated |
| Form 4a | Separated | Separated | Separated | Not separated from units |
| Form 4b | Separated | Separated | Separated | Separated from units |
The single most important diagnostic rule: start with the easiest solution first. Nine times out of ten, a burr problem is die clearance drift or punch wear — not a catastrophic frame issue. Test clearance and sharpen tools before ordering parts.
Punching Machine Not Working: Troubleshooting Hydraulic, Electrical & Control Failures
When a punching machine is not working, the diagnosis splits three ways: hydraulic, electrical/control, or mechanical. Most operators can rule out mechanical issues in the first 30 seconds — if the ram moves at all, the bearings and guides are probably fine.
Step 1: Verify electrical power and control panel.
- Check that the main breaker is ON and the control panel indicator lights are lit.
- Press the “Start” button. If nothing happens, measure voltage at the pump motor starter coil with a multimeter (should read line voltage).
- If no voltage, the problem is upstream (broken control wiring, failed relay, tripped safety interlock).
- If voltage is present but motor doesn’t run, the pump or motor is failed — this requires service technician.
Step 2: Check the E-stop and safety interlocks.
- Many machines have a “machine not working” state because an E-stop is partially engaged or a light curtain is broken.
- Press the E-stop button fully, then twist to reset (red button with yellow ring). The machine should respond.
- Walk around all light curtains and look for LED status lights. If any show red or dim, the beam is broken — check for debris or misalignment.
- If a safety interlock is stuck, do NOT bypass it — call maintenance.
Step 3: Listen for pump running and measure hydraulic pressure.
- Start the machine and listen for the pump motor humming. If you hear nothing, the pump motor is not running (electrical issue).
- If you hear the pump but the ram won’t move, measure the main hydraulic pressure with a test gauge at the pump outlet (if your machine has a test port).
- Normal pressure should be 180–250 bar for low-tonnage machines, 250–350 bar for high-tonnage. If pressure is zero or very low, the pump may be cavitating (low fluid level), or the pressure relief valve may be stuck open.
- Check the hydraulic fluid level in the tank. If it’s low, top it up and try again. If it stays low, there’s a leak somewhere — inspect hose connections and the cylinder rod seals.
Step 4: Check for control lockout or interlock fault.
- Some machines have a “maintenance mode” switch or a “turret locked” fault light. If the turret is locked in position, press any “unlock turret” button on the control panel, or cycle the power off and on.
- If a fault code appears on the display, consult the machine manual or call the manufacturer’s service line — fault codes are machine-specific.
When to call a service technician:
- Hydraulic pressure is zero and fluid level is full (pump or relief issue).
- Control panel lights won’t come on even with main breaker ON (electrical distribution failure).
- Motor hums but pump shaft doesn’t spin (coupling failure or pump jam).
- Machine cycles once, then stops permanently (controller fault).
The key rule: “Not working” is usually not catastrophic — it’s typically a lockout, an empty tank, or a broken sensor. Ninety percent of these are resolved in under 30 minutes by someone familiar with the machine’s control logic.
Turret Punching Burr Causes: Root-Cause Diagnosis (Worn Punch, Die Clearance, Misalignment)
A burr on a punched hole is the single most visible quality problem — and it’s also the most diagnostic. The location and size of the burr almost always point to a specific root cause. This section teaches you to read what your parts are telling you.
Burr on both sides of the hole, small and uniform:
This is normal for edge quality and usually indicates everything is working correctly. Under 10% of material thickness is acceptable on most specs. No action needed — this is the baseline.
Burr on one side only, much larger on one side:
Root cause: Turret station misalignment. The punch is not entering the die perpendicularly; it’s hitting one side of the die opening first, creating a pressure imbalance. The off-center load causes a larger burr on the struck side.
Diagnostic test:
- Mount a dial indicator on the punch tip.
- Position it to sweep across the die opening as you manually cycle the machine (power OFF, use hand crank or hydraulic manual lever if available).
- The dial indicator should read the same (zero runout) at all points across the die bore. If it shows variation >0.05 mm (0.002″), the station is misaligned.
Fix: Loosen the station mounting bolts, use the dial indicator to center the bore, then re-tighten to torque spec. Re-verify with the dial indicator. Test-punch a sample.
Burr consistently large (both sides), increases over time:
Root cause: Worn punch (dulled cutting edge). As the punch face rounds under repeated impact, the shearing action degrades into crushing, which causes larger burrs. Worn punches require more tonnage and generate more heat.
Diagnostic test:
- Inspect the punch tip under 10× magnification. Look for rounding at the cutting edge (should be a sharp 45° or sharper angle).
- Measure die clearance: if it’s still correct (within ±0.05 mm of nominal), the punch is the culprit, not clearance drift.
- Compare the punch to a new one side-by-side under the magnifier — the difference in edge sharpness is obvious.
Fix: Sharpen the punch on a precision stone or replace it if the edge is too worn (rounded >0.5 mm). Verify clearance hasn’t drifted during use.
Burr large and inconsistent, slugs sometimes stick in the die:
Root cause: Die clearance too loose. The punch is slamming through the material with minimal resistance, allowing excessive deformation around the cut edge. Loose clearance also allows the slug to fold back into the die cavity (“slug pulling”).
Diagnostic test:
- Measure die clearance with a feeler gauge: insert it into the gap between punch and die and note the thickness where it starts to bind. Compare to the original spec (usually 10–25% of material thickness).
- If clearance is 50–100% larger than spec, it has drifted — this usually indicates punch wear (punch is smaller than nominal) or die wear (opening is larger than nominal).
Fix: If the punch is worn, sharpen or replace it (this usually restores clearance). If the die is worn (unlikely on newer tooling but common on 10+ year old dies), consider replacement or resleeving.
Burr only on hard materials (stainless, high-strength steel), but not on mild steel:
Root cause: Clearance too tight for the harder material. Hard materials require slightly more clearance than mild steel because their shear strength is higher and the cut edge tends to compress rather than fracture cleanly.
Diagnostic test:
- For mild steel, measure clearance with feeler gauge. For stainless, reduce the clearance by 20–30% to see if burrs improve.
- If burrs improve with tighter clearance on stainless, the original clearance was too loose for that material.
- If burrs worsen with tighter clearance, increase it slightly — stainless sometimes prefers slightly more clearance than the handbook suggests.
Fix: Use material-specific die clearance tables (IEC or the die manufacturer’s recommendations). Keep separate tooling for mild steel vs. stainless if your volume supports it.
Summary decision tree for turret punching burr diagnosis:
- Is the burr one-sided and large? → Station misalignment. Dial-test and realign.
- Is the burr uniform but growing over time? → Punch wear. Sharpen or replace.
- Is the burr large and clearance is obviously loose? → Die clearance drift. Sharpen punch (restores clearance) or replace die.
- Does the problem vary by material? → Material-specific clearance issue. Adjust clearance or use different tooling per material.
How to Detect a Broken Punch: Visual & Functional Warning Signs
A broken punch is a catastrophic event — fragments become shrapnel, the die is destroyed, and the machine frame can be damaged. The good news: broken punches rarely arrive without warning. Detecting the precursors saves downtime and prevents injury.
Visual inspection — what a healthy punch looks like:
- Sharp, unblemished cutting edge (when examined under magnification, should be a clean 45° or sharper angle).
- No chips or cracks visible at the tip or side edges.
- No galling or adhesion marks (material stuck to the punch face).
- No discoloration or burn marks (sign of overheating).
- Shank surface smooth, no bending or lateral play in the tool holder.
Early warning signs (before total breakage):
| Warning Sign | What It Means | Action |
|---|---|---|
| Small chip at cutting edge | Micro-fracture forming; will propagate under load | Replace or sharpen immediately; don’t wait |
| Rounding of the cutting edge (examined under magnifier) | Punch is dulling from normal wear; shearing is degrading to crushing | Sharpen or replace — preventive action |
| Galling / material adhesion on tip | Material is bonding to the punch; temperature rising; edge load increasing | Clean punch, reduce cycle speed, verify clearance, consider coating or material change |
| Visible crack (hairline near the tip) | Fatigue crack initiated; will accelerate under continued punching | STOP — remove punch immediately. Do not continue operation. |
| Bend or lateral play in the shank | Punch has absorbed impact deformation; imminent failure risk | Remove immediately; inspect machine and die alignment |
| Discoloration or burn marks | Overheating; loss of material hardness; possible metallurgical damage | Replace and investigate cause (load, clearance, cooling) |
| Partial breakage (missing edge fragment) | EMERGENCY — punch is fragmenting | Stop machine, remove fragments, inspect die, replace punch set |
Functional tests that reveal a broken punch before catastrophe:
1. Listen during operation.
- A healthy punch has a clean, consistent “snap” sound at each strike.
- A punch with a chip or crack produces a dull “clunking” sound followed by a sharper crack sound — the sound of fragments breaking loose.
- If you hear a distinctive change in rhythm or pitch, investigate immediately.
2. Feel the vibration.
- Place your hand on the press frame (away from the cutting area) during operation.
- A healthy machine has smooth, rhythmic vibration.
- A failing punch produces irregular vibration — it will feel like stuttering or a periodic “thump.”
3. Monitor the part quality.
- A gradually increasing burr over a run of 100 parts = normal wear.
- A sudden jump in burr size on one part = chip in the punch.
- A perfectly cut part followed by a shattered hole = crack in the punch.
- A hole that’s incomplete or has a divot in it = punch fragment broke off and is missing.
4. Magnifier inspection at tool change.
- Every time you change a punch or die, spend 30 seconds inspecting the old tool under a 10× magnifying glass.
- Look for the four warning signs: chips, cracks, galling, discoloration.
- A logbook note (“chip visible on E12 punch, replaced 2024-01-15”) becomes historical data that helps predict when that station’s punches need preventive replacement.
When to stop production immediately (do NOT try to finish the batch):
- A visible crack in the punch (any size).
- A large chip (>1 mm) at the cutting edge.
- A bent or twisted shank.
- An unexplained change in press sound that correlates to a quality change.
After a broken punch event:
- Remove all punch fragments from the die cavity and surrounding area (use a magnet and/or flashlight; fragments are sharp).
- Inspect the die surface for damage (look for chips, cracks, or flattened areas on the die opening).
- If the die is damaged, it needs resleeving or replacement — don’t ignore die damage; it will cause failures in the replacement punch.
- Document the event: date, time, machine, tool station, material being punched, part count before failure. This data helps identify whether the failure was isolated (random) or systematic (wrong tooling for the job).
- Order a replacement punch; if this is a high-volume tool, order two so you have a spare.
Punch Press Alignment and Calibration: Quarterly Checks That Prevent Crashes
Misalignment is the second-leading cause of burrs and broken punches (after tool wear). Quarterly dial-indicator checks catch alignment drift before it shows up in your parts. Calibration and alignment of punch press machines should occur annually or after any crash. Use a dial indicator to sweep the station bores. If the turret is out of alignment, the punch will hit the die edge, destroying both. Precise alignment ensures safe, burr-free production.
Further exploration of corner and angle notching machines and their alignment requirements can be found in the following recommended reading.
Punch Press Safety Compliance and Operator Training
Adherence to safety compliance standards for punching presses (OSHA, etc.) is a legal and ethical imperative. Compliance is not a one-time checkbox but an ongoing culture. Managers must audit their floor regularly to ensure guards are in place and LOTO is being used.
Training is the backbone of compliance. Operator safety training for punch press machines must be refreshed annually. New hires should never operate a press unsupervised until they demonstrate competence in both operation and safety protocols.
Records of this training must be kept for inspection. In the event of an accident, proof of training is the first thing investigators will request. It validates that the company took reasonable steps to ensure punching press operation safety.
Finally, encourage a culture where operators feel safe reporting hazards. If an operator notices a delayed E-stop or a loose guard, they should be empowered to stop the line without fear of reprisal. Safety is a collective responsibility.
Further exploration of ISO 13849 can be found in the following recommended reading.
OSHA and Safety Standard Compliance for Punching Machines
Violating OSHA standards leads to severe fines. Ensure your machine guarding in punching presses meets the distance-to-hazard formulas. Regular third-party audits can help identify compliance gaps that internal teams might overlook due to familiarity. Documentation of all safety upgrades is essential for inspections.
Training Programs for Safe Punch Press Operation
Effective training covers more than just buttons. It must explain the physics of the machine and the consequences of bypassing safety systems. Operator training programs should include hands-on drills for emergency scenarios, ensuring operators react instinctively during a crisis.
Suggested Maintenance Schedule
| Tools/Equipment Needed | Description | Frequency | Maintenance/Safety Task |
|---|---|---|---|
| Cleaning cloths, vacuum | Remove metal debris, dust, and oil from machine surfaces | Daily | Cleaning the Punching Machine |
| Grease gun, oil | Apply lubricant to guides and punches | Daily | Lubrication of Moving Parts |
| Micrometers, gauges | Check dies for wear, cracks, and misalignment | Weekly | Tooling and Die Inspection |
| Wrench, sealant, fluid | Inspect fluid levels and check for leaks | Weekly | Hydraulic System Check |
| Multimeter | Inspect wiring and control panels | Monthly | Electrical System Check |
| LOTO locks, tags | Deactivate energy before internal maintenance | As Needed | Lockout/Tagout (LOTO) |
| Visual inspection | Verify guards are in place and functional | Monthly | Machine Guarding Inspection |
| Dial indicators | Ensure dies are aligned for precision | Quarterly | Die Alignment |
| Testing equipment | Test E-stops and interlocks | Quarterly | Safety Feature Check |
| Training manuals | Refresh protocols and emergency procedures | Annually | Operator Safety Training |
| Magnifier (10×), feeler gauge, dial indicator | Inspect punch/die for chips, cracks, galling; verify alignment and clearance | Monthly | Preventive Punch & Die Inspection (Prevents Burrs & Crashes) |
Conclusion
Punching machine maintenance and troubleshooting are two sides of the same coin. The machine that never breaks is the one where operators know what “normal” sounds and feels like — and spot the first sign of deviation. The machine that produces consistent parts with minimal burrs is the one where die clearance and tool sharpness are monitored monthly, not discovered during scrap review. And the machine that stays safe is the one where guards work, E-stops reset cleanly, and operators understand that a “machine not working” situation usually means 30 minutes of diagnosis, not a catastrophic failure.
This guide has walked you through the full lifecycle: daily cleaning and lubrication (the foundation), weekly and monthly inspections (the early-warning system), quarterly calibration (the precision lock), and the troubleshooting logic you need when something does go wrong. Keep a logbook. Inspect punches under magnification at every tool change. Listen to your machine. Test your E-stop monthly. And when a burr appears or a punch shows a chip, fix it that shift — not next week.
To further enhance your operations with reliable, high-performance equipment designed for precision and durability, visit PAYAPRESS, a trusted manufacturer of advanced punching machines engineered to deliver consistent performance across decades of production.




Rate this article
Choose a rating from 1 to 5 stars.
No ratings yet