

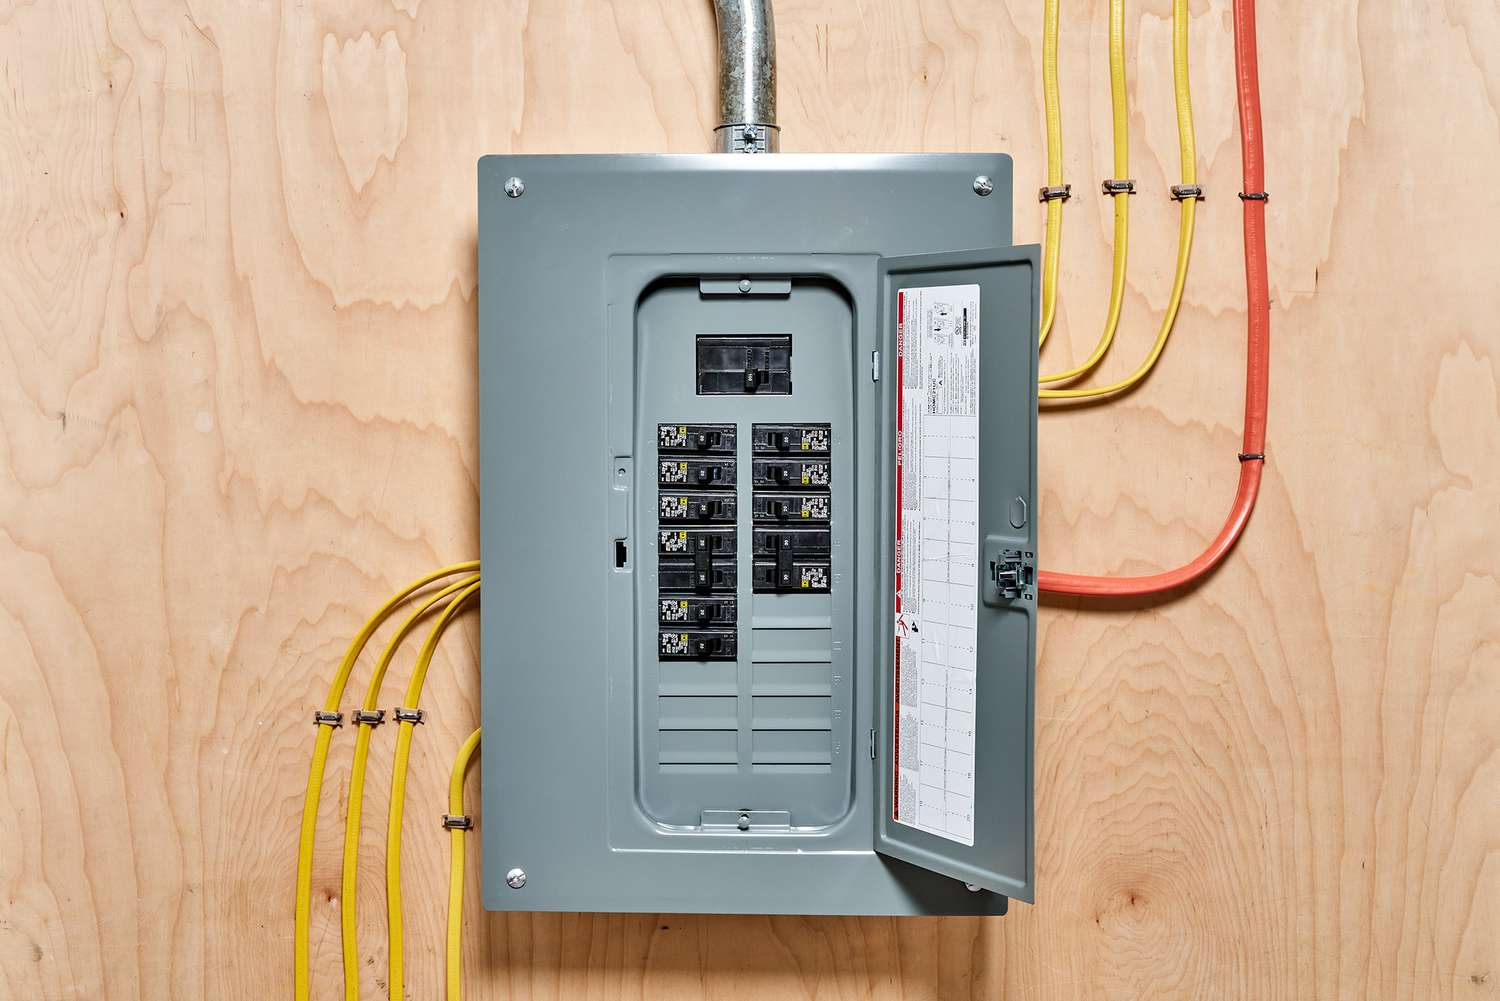





What Is a 200 Amp Panel?
The electrical panel is sometimes called a breaker box, a service panel, or a load center. No matter the name, it has one main job: to take the incoming power from the utility company and safely distribute that power to all the circuits in your house.
When we say “200 amp panel,” we are talking about the maximum current that the panel is designed to handle. In simple words, the panel can safely carry up to 200 amperes of electrical load at any moment, if everything is wired correctly and installed according to code. For comparison, many older houses still have 60 amp or 100 amp panels, which are usually not enough for a modern lifestyle with many electrical devices.
In most single‑family houses in North America, the main service is single‑phase, 120/240 volts. That means your 200 amp panel is able to provide up to 200 amps at 240 volts across the whole service, not 200 amps on every circuit. All branch circuits share this total capacity, and the distribution is controlled through different circuit breakers.
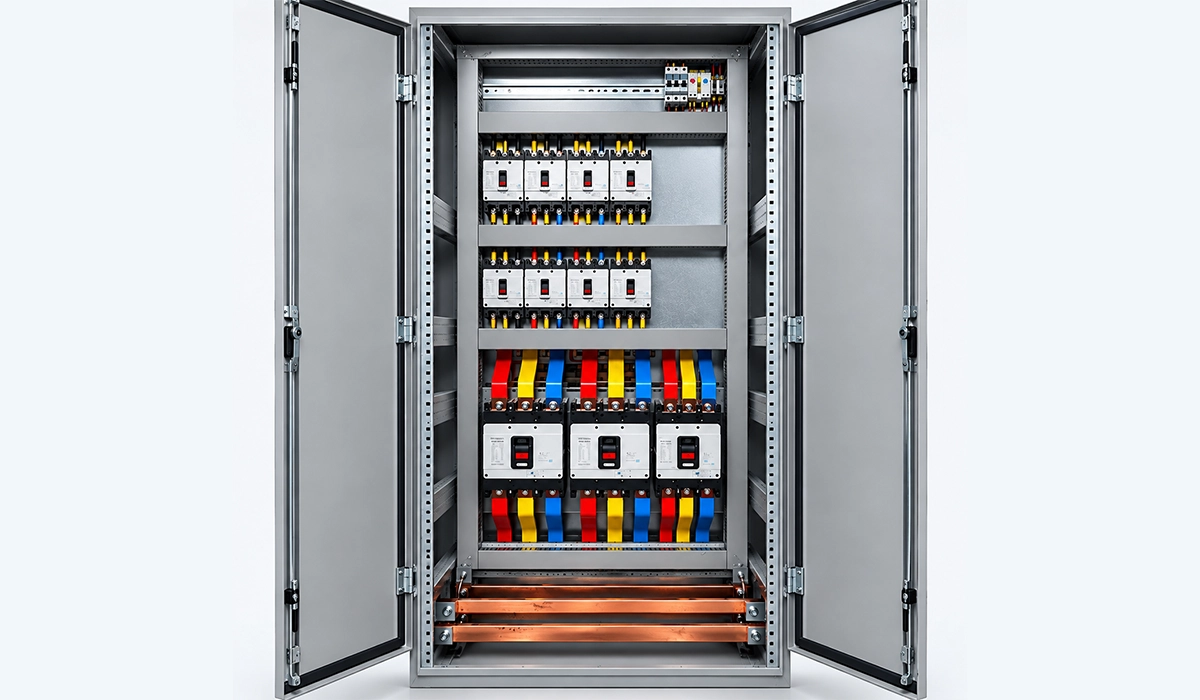
To understand your 200 amp panel better, let us review the main components you will usually see inside:
Main Breaker vs Main Lug Only (MLO)
Most standard residential 200 amp panels have a large main breaker at the top. This main breaker is like a master switch for the entire panel. If there is a serious problem, you can shut off all power to the house by switching off the main breaker. It also gives overcurrent protection for the whole service; if the total current exceeds what the panel can safely handle, the main breaker trips.
Some panels, called “main lug only” panels, do not have a main breaker. Instead, they are designed to be used as subpanels or in systems where the main disconnect is located somewhere else, such as near the meter. In that case, the panel is fed from an upstream breaker, and the lugs inside the panel simply receive the incoming wires.
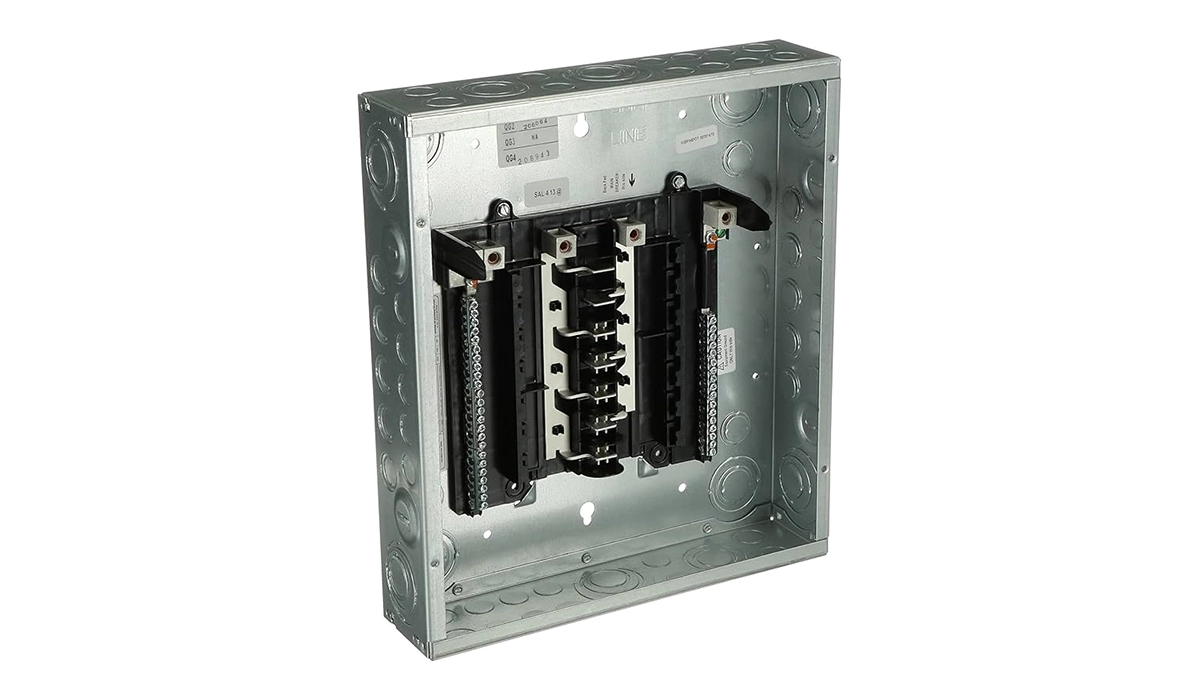
Busbars
Bus bars are the thick metal strips inside the panel that carry power from the main breaker to the individual circuit breakers. They are usually made from copper or aluminum. Copper bus bars offer better conductivity and long‑term reliability, but aluminum bus bars are also widely used and can be safe if they are properly designed and installed. When you plug a circuit breaker into the panel, the breaker’s metal clip grips onto the bus bar, and that is how power flows from the main service into each branch circuit.
Panel performance depends on busbar quality — material, cross-section, and how precisely the bar was formed and drilled. A misaligned hole or a poor bend concentrates resistance at exactly the point that carries the most current.
Circuit breakers
Circuit breakers are the small switch‑like devices lined up inside the panel. Each one protects a specific branch circuit: for example, kitchen receptacles, living room lights, laundry sockets, or the air‑conditioning unit. If a circuit becomes overloaded or there is a short circuit, the breaker trips and disconnects that circuit to prevent overheating and fire.
In modern installations, we also use special safety breakers:
- GFCI (Ground‑Fault Circuit Interrupter) breakers for wet locations such as bathrooms, garages, outdoor circuits, and sometimes kitchens. These breakers protect human life by quickly cutting power if they detect a difference between the outgoing and returning current, which can indicate a ground fault through a person’s body.
- AFCI (Arc‑Fault Circuit Interrupter) breakers for many living areas such as bedrooms and family rooms. These breakers are designed to detect dangerous electrical arcing that can start a fire behind walls or inside cords, even when the total current is not very high.
Neutral and ground busbars
Inside the panel, you will find bars with many screw terminals. Some are for neutral wires (usually white or gray), and some are for grounding wires (usually bare or green). In the main service panel, neutral and ground are bonded together and connected to the metal enclosure and the grounding electrodes (e.g., ground rods). In subpanels, the neutral and ground must be isolated, which means they are kept separated and not bonded together.
This difference is very important for safety. The grounding system provides a low‑resistance path for fault current, so that a breaker trips quickly during a fault. The neutral provides a return path for normal load current. Mixing these improperly can create shock hazards and strange current paths.
Number of spaces and circuits
A typical 200 amp breaker box for a modern home will have around 40 to 42 spaces for standard‑size breakers. Some models offer even 54 or 60 spaces. Having more spaces is very useful if you plan to add new loads in the future—for example, an EV charger, a heat pump, or a home workshop.
Even when a 200 amp panel has 40 spaces, the total number of circuits can sometimes be higher if the panel is listed for tandem or “twin” breakers. However, you must always follow the manufacturer’s instructions; not every space is allowed to take tandem breakers.
NEMA enclosure rating: indoor vs outdoor
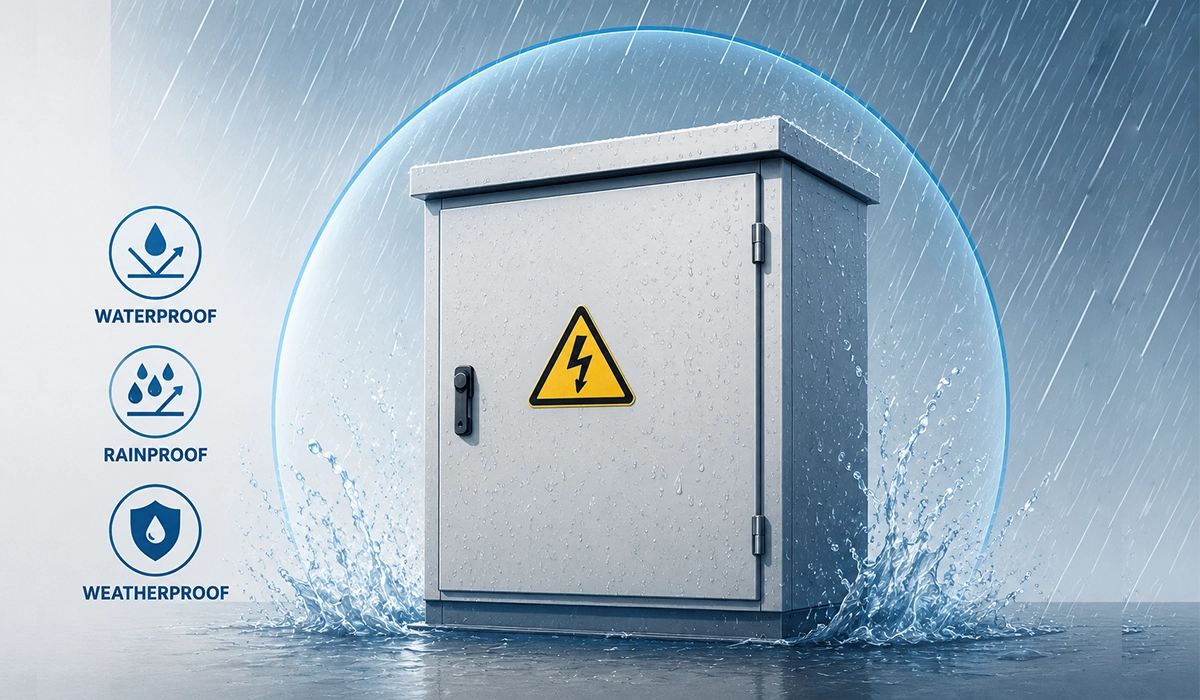
Panels installed indoors in dry locations, such as basements or utility rooms, usually have a NEMA 1 rating. Panels that are installed outside, exposed to rain and sun, need a NEMA 3R or similar weather‑resistant enclosure. These outdoor boxes have rain‑tight covers, proper drainage, and sometimes gasketed doors to keep water out and protect the breakers inside.
Interrupting rating (AIC) and UL 67 listing
Each panel and breaker also has an interrupting rating, sometimes shown as AIC (amperes interrupting capacity). This value tells you how much fault current the breaker can safely interrupt without exploding or failing. In residential systems, typical AIC ratings are 10,000 amps or 22,000 amps, depending on the available fault current from the utility.
For safety and code compliance, you should always choose a 200 amp panel that is listed and labeled according to UL 67 for panelboards. This listing means the panel has passed strict tests for insulation, mechanical strength, temperature rise, and many other parameters. For the enclosure itself, UL 50 or related standards apply.
How Many Breakers Can a 200 Amp Panel Hold?
Most 200 amp panels have 40 to 42 full-size breaker spaces. Larger models offer 54 or 60. With tandem breakers in the positions that accept them, the circuit count can go higher than the space count.
Spaces vs Circuits — Not the Same Number
A space is a physical position on the busbar. A circuit is what’s connected to it. A full-size single-pole breaker takes one space and gives one circuit. A tandem (or “twin”) breaker fits two circuits into one space. A two-pole breaker for a 240 V load takes two spaces and gives one circuit.
So a 40-space panel might hold anywhere from 20 circuits (all two-pole) to 60+ circuits (heavy tandem use). The panel label states the maximum number of circuits permitted, and that number is binding.
The 42-circuit limit no longer exists. The NEC removed it in the 2008 edition. What governs now is the panel’s own listing and labelling.
How Many 50 Amp Breakers Can a 200 Amp Panel Take?
This surprises people: the sum of your breaker ratings can legally exceed the panel’s rating. There’s no NEC rule capping the total of branch breaker ratings in a dwelling panelboard.
Four 50 amp breakers total 200 amps on a 200 amp panel — and you could fit more. Eight of them totalling 400 amps would still be code-compliant, provided the calculated load stays within the service rating.
The reason is load diversity. Breakers protect their conductors; the load calculation protects the service. Your dryer, range, EV charger and hot tub are never all at full draw simultaneously, and NEC Article 220 demand factors account for that.
What actually limits you: available spaces, and the NEC 220 calculated load. If the calculation exceeds the service rating, you need a bigger service — regardless of how the breakers add up.
Which Spaces Accept Tandem Breakers?
Not all of them. The panel’s label and the manufacturer’s instructions specify exactly which positions are tandem-rated — often only the bottom rows, sometimes only alternate positions. Many modern panels use a CTL (Circuit Total Limiting) rejection design that physically blocks tandems in non-approved spaces.
Installing a tandem in a non-rated position is a code violation and an inspection failure, even where it physically fits.
Is 200 Amps Enough for a House? The NEC 220.82 Load Calculation
For most single-family homes, yes — and you can check it yourself in about ten minutes. The article keeps saying “get a load calculation”; here’s the actual method.
NEC 220.82 is the optional method, permitted for a dwelling served by a single 120/240 V (or 208Y/120 V) three-wire service rated 100 A or greater. It’s faster than the standard method in Article 220 Part III and usually produces a lower — still fully code-compliant — number.
The Optional Method, Step by Step
Step 1 — General and appliance loads, per 220.82(B):
- 3 VA per square foot of habitable area (exclude garages, open porches, unfinished space)
- 1,500 VA for each small-appliance branch circuit (minimum two)
- 1,500 VA for the laundry circuit
- Nameplate rating of every fastened-in-place appliance — range, dryer, water heater, dishwasher, disposal
- EV charging at 7,200 VA or nameplate, whichever is larger (NEC 220.57); an EMS setpoint may be used under 220.70
Step 2 — Apply the demand factor:
- First 10,000 VA at 100%
- Everything above that at 40%
Step 3 — Add space conditioning, per 220.82(C). The larger of heating or cooling, never both. AC at 100% of nameplate. Heat pump: 100% of compressor plus 65% of supplemental heat. Electric space heating with fewer than four separately controlled units: 65%.
Step 4 — Divide by 240 V to get amps, and compare against the service rating.
Worked Example — 2,400 sq ft Home with an EV Charger
| Load | VA |
|---|---|
| General lighting: 2,400 ft² × 3 VA | 7,200 |
| Two small-appliance circuits | 3,000 |
| Laundry circuit | 1,500 |
| Electric range | 12,000 |
| Electric dryer | 5,000 |
| Water heater | 4,500 |
| Dishwasher | 1,200 |
| EV charger (48 A × 240 V) | 11,520 |
| Subtotal | 45,920 |
Demand factor: first 10,000 at 100% = 10,000. Remaining 35,920 at 40% = 14,368. Subtotal 24,368 VA.
Add the larger of heating or cooling — a 3-ton AC at 36 A × 240 V = 8,640 VA.
Total = 33,008 VA ÷ 240 V ≈ 138 A.
That’s comfortably inside a 200 amp service, with roughly 60 A of headroom and still under the 160 A continuous comfort line. The same house on a 100 amp service would fail outright.
Notice what the demand factor does: 46 kVA of connected load calculates to 24 kVA. This is why 200 amp panels usually have room for an EV charger even when the nameplate arithmetic suggests otherwise.
Signs You Need a 200 Amp Service Upgrade
Now that we know what a 200 amp panel is, the big question is: do you actually need one? Not every small house needs a 400 amp service, but in many cases, a 100 amp service is clearly not enough anymore.
In the past, many homes were built with gas heating, gas water heaters, and only a few electrical appliances. A 60 amp or 100 amp panel was enough. But today we see:
- Larger HVAC systems (central air‑conditioning, heat pumps).
• Electric ranges and ovens.
• Electric water heaters and sometimes tankless units.
• Clothes dryers.
• Hot tubs or spa pumps.
• Multiple computers, large TVs, and home entertainment systems.
• EV chargers using 40–50 amp circuits for many hours.
Each of these loads adds pressure to the electrical system. When we combine many of them, the total demand can easily exceed what a 100 amp service should safely provide.
Typical panel sizes for different houses
We can think about the comparison in a simple way:
- 100 amp panel: Very small or older homes, often using gas for most heavy loads. Little spare capacity. Not recommended for houses with EV chargers or many large electric appliances.
- 200 amp panel: The modern standard for many single‑family homes. Enough capacity for typical HVAC systems, electric ranges, and one EV charger, plus room for future additions.
- 400 amp panel: Large luxury homes, fully electric houses with multiple EV chargers, large workshops, or special loads like big pools and spa systems.
Instead of focusing only on square footage, consider your lifestyle: do you plan to switch from gas to electric appliances? Do you want a home office with many computers and servers? Are you planning to install rooftop solar or battery storage? Once you think about the next 10–20 years, you will see why 200 amp service is often the minimum smart choice today.
Warning signs that your current panel is too small or too old
Even if you are not planning a big renovation, your current panel may be sending you signals that it is under stress:
- Frequent tripping: If breakers trip often when you run a microwave and toaster at the same time, or when the AC starts, your system may be overloaded.
- Dimming lights: If the ceiling lights dim or flicker every time a large appliance starts, this is a sign that your panel and service may be struggling with voltage drop or load spikes.
- Heat and smell: A warm panel cover, buzzing noises, or any burning smell near the breakers is a serious warning. Turn off power and call an electrician immediately.
- Rust and corrosion: Moisture damage on or inside the panel can compromise safety and should be inspected by a professional.
- Very old panels: Some brands and models from decades ago are now known to have serious safety problems. A panel older than 25–30 years, especially if it has never been inspected, is a strong candidate for replacement.
Upgrading to a 200 amp panel in these situations is not just about convenience; it is about protecting your family and your property from fire and shock hazards.
Wire Size for a 200 Amp Service
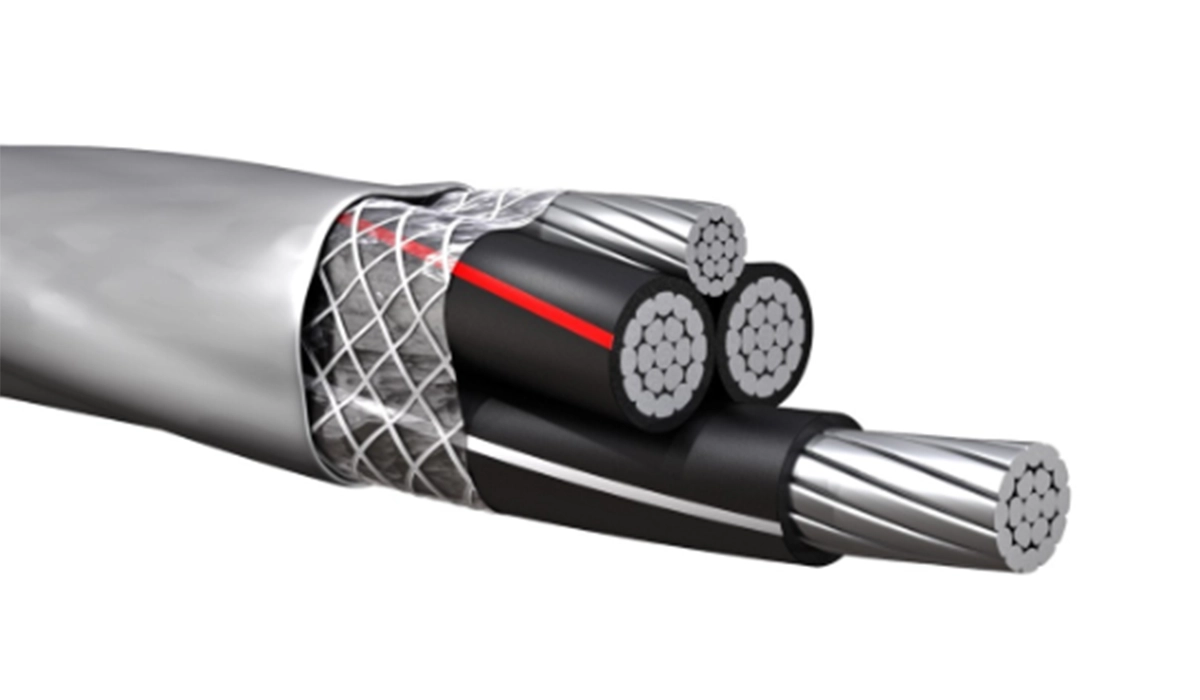
One big difference between a 100 amp and a 200 amp service is the size of the conductors (wires) that bring power from the utility to your main panel. A 200 amp service requires thicker conductors so they can carry the higher current without overheating.
In many dwelling applications, the National Electrical Code allows the following standard sizes for a 200 amp service entrance:
- 4/0 AWG aluminum conductors, or
• 3/0 AWG copper conductors.
These sizes come from NEC 310.12, which permits dwelling services and feeders carrying the entire dwelling load to be sized at 83% of the service rating. For 200 A that’s 166 A, which lands on 4/0 aluminium or 3/0 copper in the 75 °C column.
The limit that catches people: 310.12 applies only to the service, or to a feeder supplying the entire dwelling load. A feeder to a garage subpanel or a partial-load subpanel doesn’t qualify — those size under Table 310.16, which for 200 A means 250 kcmil copper or 350 kcmil aluminium.
Service entrance, feeders, and branch circuits
It is useful to separate three different types of conductors in your home:
- Service entrance conductors: These wires run from the utility connection and meter to your main 200 amp panel. When you upgrade from 100 amp to 200 amp service, these are almost always replaced with larger conductors.
- Feeders: These are larger conductors that run from the main panel to a subpanel in another part of the house, such as a detached garage, a basement workshop, or a second‑floor panel.
- Branch circuits: These are the typical wires that run from circuit breakers to lights, outlets, and small appliances.
When you upgrade your service to 200 amps, you usually do not have to change every branch circuit in the house. If the existing branch circuits are in good condition and meet basic code requirements, they can remain in place. The main focus of the upgrade is the new 200 amp panel, the new service entrance conductors, and sometimes new feeders to important subpanels.
Voltage drop and long runs
For long runs, especially for detached buildings or long driveways, voltage drop becomes more important. The longer the wire, the more resistance it has, and the more voltage you lose along the way. Good practice is to maintain no more than 3% voltage drop on branch circuits and no more than 5% total drop on feeders plus branch circuits combined.
In simple language, if your garage is very far from your house and you want to feed it with a 60 amp subpanel, you may need thicker conductors than the minimum size listed in the code to keep voltage drop under control. A licensed electrician can calculate this for you based on distance and load.
How to Choose the Right 200 Amp Panel: Practical Selection Guide
When you search online or visit a supplier, you will see many different 200 amp load center models from different manufacturers. The amp rating alone is not enough to choose the right panel. Here are some key criteria you should check carefully.
How Many Spare Spaces to Specify for Future Loads
If you are upgrading from a very old and crowded panel, you should not buy another panel that will become crowded again in a few years. It is wise to choose a 200 amp panel with at least 40 spaces, and many electricians prefer models with 54 or 60 spaces for modern homes. Extra space makes it easier to add new circuits for future needs, such as:
- A dedicated circuit for a home office.
A circuit for a hot tub or sauna.
New split‑system air conditioners.
An EV charging station.
A future solar backfeed breaker if allowed by the design.
A working rule: specify at least 30% spare spaces at handover. On a 40-space panel that’s 12 free positions; on a 60-space panel, 18.
What typically arrives later, and what each needs:
| Future addition | Spaces required |
|---|---|
| Level 2 EV charger | 2 |
| Second EV charger | 2 |
| Heat pump / mini-split | 2 per unit |
| Hot tub or sauna | 2 |
| Solar backfeed breaker | 2 |
| Battery storage | 2 |
| Workshop subpanel feeder | 2 |
Six of those consume 14 spaces. A 40-space panel that arrives 80% populated has no room for the electrification most homes will do within a decade. The cost difference between a 40-space and a 60-space panel is small; the cost of a second panel swap is not.
On amperage: choose 200 A as the baseline for a modern single-family home. Step to 225 A or 400 A only where the load calculation demands it — oversizing the service means larger conductors, a larger meter base, and often a utility charge, for capacity you may never use.
Busbar material: copper vs aluminum
Bus bars and internal connections can be made from copper or aluminum. Copper bus bars cost more but provide long‑term stability and are less sensitive to certain corrosion issues. Aluminum bus bars are accepted and widely used if the panel is designed correctly and installed with the right torque and anti‑oxidant compound where required.
From a homeowner’s point of view, both can be safe. If your budget allows, a panel with copper bus bars is often a nice upgrade for extra reliability.
Plug‑on neutral design
Many modern panels include “plug‑on neutral” rails that allow you to install AFCI, GFCI, or dual‑function breakers without extra pigtail wires going to the neutral bar. This design keeps the panel interior much cleaner and makes installation faster for the electrician. If you plan a new panel, it is worth choosing a design that is ready for these advanced breakers, because code requirements for AFCI and GFCI protection are growing every year.
Interrupting rating and local fault current
The panel and breakers must have an interrupting rating that is equal to or higher than the available fault current from your utility service. In many residential neighborhoods, 10 kAIC breakers (10,000 amp interrupting capacity) are common, but in areas with strong utility infrastructure, 22 kAIC or higher may be required.
Your electrician can check with the utility or calculate the available fault current and choose appropriate breakers and panels.
Indoor panel or outdoor panel (NEMA 1 vs NEMA 3R)
If your main service panel will be located outside, you must choose a load center with an outdoor‑rated NEMA 3R enclosure. These enclosures are rain‑tight, often with a sloped top or special drip design so water does not collect, and sometimes with a latch or lock to prevent unauthorized access.
For indoor installations in dry locations, NEMA 1 enclosures are fine and more compact. In some regions, local code prefers outdoor meter‑main combinations, so you might have an outdoor 200 amp main disconnect and an indoor 200 amp subpanel.
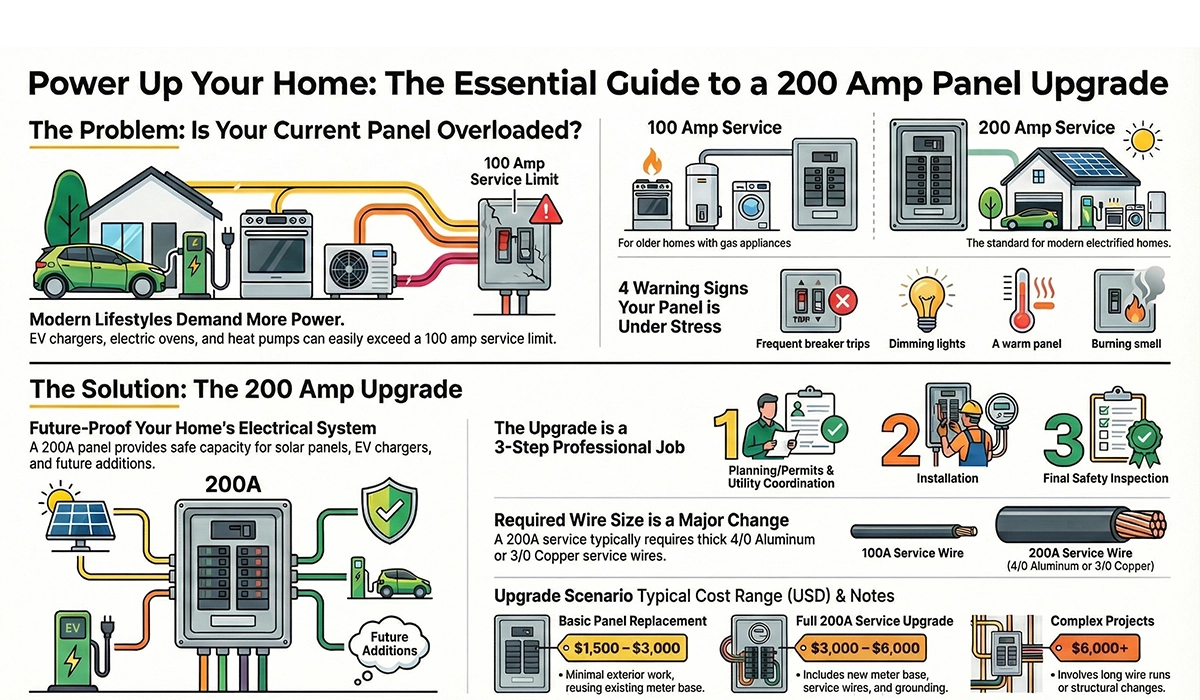
Step‑by‑Step Overview of a 200 Amp Service Upgrade
Upgrading to a 200 amp panel is not just a simple swap of one box for another. It is a complex project that involves coordination with your local utility, permits from the building department, and strict safety procedures. Here is a simplified step‑by‑step view of what usually happens during a typical upgrade from 100 amp to 200 amp service.
If your upgrade involves a detached garage, long feeders, or any underground run, conduit choice and burial depth matter a lot — conduit types, trench prep, and NEC cover requirements are covered in that guide.
Planning, load calculation, and permits
First, a licensed electrician visits your home and listens to your goals: for example, you want to add an EV charger, renovate the kitchen, or prepare for solar panels. The electrician performs a load calculation based on the size of the home, the number of major appliances, and future plans. If the calculation shows that 200 amp service is appropriate, they will design the upgrade.
Next, the electrician applies for an electrical permit from the Authority Having Jurisdiction (AHJ), which is usually your city or county building department. The permit makes sure that the work will be inspected and that it follows the NEC and local amendments.
Utility coordination and scheduling
Because the service entrance conductors and meter are involved, the utility company must disconnect power at the right time. In most places, the electrician contacts the utility in advance and schedules a day for the shutdown and reconnection. On that day, the power is turned off, the meter is removed, and the service cables are made safe so the electrician can work on the system.
Removing the old panel and preparing the new one
After the power is off, the electrician labels and carefully disconnects all the branch circuit wires from the old panel. The old panel is removed from the wall. If the service mast or meter base also needs to be upgraded to 200 amps, these parts are replaced or modified as needed, often using a 2‑inch conduit for the new service entrance conductors.
The new 200 amp panel is then mounted securely at the correct height and location, respecting the NEC working‑space rules (usually at least 30 inches wide and 36 inches clear space in front).
Installing new 200 amp service conductors
New 4/0 aluminum or 3/0 copper service entrance conductors are installed between the meter base and the main breaker in the panel. If aluminum conductors are used, an approved anti‑oxidant compound is applied to the conductor ends before securing them under the lugs. This reduces the risk of corrosion and heating over time.
Connecting branch circuits and torquing lugs
Next, all the existing branch circuit wires are re‑connected to the new breakers. Each conductor is placed under the correct terminal and tightened using a torque screwdriver or torque wrench to the exact value printed by the manufacturer. This torquing step is very important. Loose connections can create hot spots, arcing, and fires, even if everything looks fine from the outside.
Circuits are then clearly labeled on the panel directory, so future maintenance and troubleshooting is easy.
Grounding and bonding upgrades
During a 200 amp upgrade, the electrician also checks and improves the grounding and bonding system. This may include:
- Installing two ground rods outside the building and connecting them with a bare copper grounding electrode conductor.
- Bonding the metal water pipe if present, within a certain distance of where it enters the house.
- Confirming that the neutral and ground are properly bonded in the main service panel and separated in any subpanels.
Inspection and re‑energizing the service
After the work is completed, the local electrical inspector visits the site, checks the panel, grounding, conductor sizes, and labeling, and confirms that everything follows the code. When the inspector is satisfied, they approve the installation. The utility then comes back to reinstall the meter and re‑energize the service. At this point, your house officially has a new 200 amp service.
200 Amp Panel Upgrade Cost
| Upgrade Scenario | Typical Cost Range (USD) | Notes |
| Basic panel replacement only | $1,500 – $3,000 | Minimal exterior work, existing meter and mast often reused. |
| Full 200A service upgrade | $3,000 – $6,000 | New meter base, service conductors, grounding, and permits. |
| Complex / custom projects | $6,000 – $10,000+ | Long runs, underground service, structural changes, or high local labor rates. |
Typical Cost Ranges for a 200 Amp Panel Upgrade
Homeowners often ask one question before anything else: “How much will it cost to upgrade to a 200 amp panel?” The honest answer is that it depends on several factors, but we can give realistic ranges to help you plan your budget.
Main factors that affect price
Several items have a big influence on the final cost:
- Scope of work: Is it just a panel replacement inside the house, or a full service upgrade including meter base, service mast, and new service entrance conductors? A full upgrade costs much more than a simple panel‑only replacement.
- Local labor rates: Electrician labor costs change a lot between regions and even between cities. In big metropolitan areas, hourly rates are usually higher than in small towns.
- Material choice: The price of the 200 amp panel itself, the size and price of conductors, the meter base, conduit, breakers (especially AFCI and GFCI types), and grounding materials all add to the total.
- Complexity: If the panel location must be moved, if walls need to be opened and repaired, if there is trenching for underground service, or if the existing wiring is in bad condition, the work becomes more complicated and expensive.
- Permits and utility fees: Permit costs vary by city, but they are always part of a legal upgrade. Some utilities also charge a fee for changing the service size.
Why a proper upgrade is worth the cost
At first glance, these numbers may look high, but remember that the electrical service is one of the most critical safety systems in your home. A cheap or unlicensed job can expose you to fire risk, failed inspections, or even denial of insurance claims after an incident. A properly designed and inspected 200 amp service upgrade, on the other hand, adds long‑term value and safety, and it is a strong selling point if you ever decide to sell the property.
Grounding, Bonding, and Safety Details You Should Know
Grounding and bonding are topics that many homeowners find confusing, but they are central to electrical safety. When you upgrade to a 200 amp panel, your electrician will closely check these systems.
Ground rods and grounding electrode conductor
For a 200 amp service, the NEC usually requires at least two ground rods driven into the earth, spaced a minimum distance apart (often 6 feet or more). A copper grounding electrode conductor runs from the main panel to these rods, creating a reference point between the electrical system and the earth. The size of this conductor is selected according to code tables and is typically #4 or #6 copper for many residential services.
The two-rod requirement comes from NEC 250.53(A)(2): a single rod electrode must be supplemented unless it tests at 25 ohms or less. Since almost nobody tests, driving a second rod at least 6 ft away is standard practice — it’s cheaper than the test.
Bonding the metal water pipe and other systems
If your home has a metal water piping system that enters from the ground, it must be bonded to the electrical system. A bonding jumper is connected from the panel to the pipe within a specified distance from where it enters the building. This ensures that the piping system and the electrical system are at the same electrical potential, reducing the risk of shock.
In some cases, gas piping, metal structural frames, or other conductive systems also need bonding according to code.
Neutral‑ground bond in main panel vs subpanel
The rule is simple but very important: in the main service panel, the neutral and ground are bonded together. In any downstream subpanel, neutrals and grounds must be kept separate. The neutral bus in the subpanel must be isolated from the metal enclosure, while the ground bar is bonded to the enclosure. The feeder cable to the subpanel must include a separate equipment grounding conductor.
This separation prevents normal neutral current from flowing on grounding paths, which could create shock hazards on metal parts that people touch.
EV Charging and Solar on a 200 Amp Panel
| Load Scenario | Approx. Continuous Load (A) | Comment |
| Base house (lights, plugs, appliances) | 60 – 90 A | Typical occupied home without EV charging or large new loads. |
| Base house + one Level 2 EV charger | 100 – 140 A | Panel still under 80% of 200A rating in many cases, if designed correctly. |
| Future EV + additional electrification | 140 – 160 A+ | Careful load calculation is needed to stay within safe continuous limits. |
Another big reason homeowners upgrade to 200 amp service is to prepare for electric vehicles and solar. Both introduce specific constraints on the panel.
EV charger on a 200 amp panel
A Level 2 EV charger commonly uses a 40 amp or 50 amp breaker and may draw power for many hours at night. On a 100 amp service, adding such a charger can push the system close to or beyond its safe continuous limit, especially if other large loads run at the same time. With a 200 amp panel, there is much more comfortable headroom.
When planning for an EV charger, your electrician will check your load calculation again and ensure that the panel still respects the 80% rule for continuous loads. In some cases, a demand‑management system or smart charger may be recommended to limit how much current the EV charger can draw when other loads are active.
Solar photovoltaic systems and busbar limits
When you install a solar PV system, power can flow from the array into the panel through a backfeed breaker. This means power is coming from both the utility and the solar system at the same time. The NEC has specific rules about how much solar current can be connected to a panel without exceeding the busbar rating.
The governing rule is NEC 705.12. Where the inverter backfeed breaker is at the opposite end of the busbar from the main breaker, the sum of the main breaker rating plus the backfeed breaker rating may not exceed 120% of the busbar rating.
On a 200 A panel with a 200 A bus and a 200 A main: 200 × 1.2 = 240 A, minus the 200 A main leaves 40 A of backfeed — roughly a 7.6 kW inverter.
Three ways past that ceiling if you need more: a supply-side (line-side) tap ahead of the main, derating the main breaker to 175 A or 150 A where the load calculation allows it, or a higher-rated busbar such as a 225 A panel with a 200 A main. Deciding this before the panel is purchased costs nothing; deciding it afterwards means a second swap.
200 Amp Main Panel, Subpanels and Meter-Main Combos
Modern homes do not always rely on a single electrical panel. There are several useful configurations that you might see when dealing with a 200 amp service.
Feeding a 200 Amp Subpanel
A typical arrangement is a 200 amp main breaker panel inside or near the main living area. From this panel, one or more feeders go to subpanels in other locations. For example, a 60 amp subpanel in a detached garage, or a 100 amp subpanel in a basement workshop or addition.
Using subpanels helps reduce long branch‑circuit runs, improves organization, and allows local shutdown of a specific area without affecting the whole house.
A 200 amp subpanel is normally an MLO (main lug only) load center fed from a 200 A breaker in the main panel — used for a large addition, a detached shop, or a second unit. Three things to get right:
- Four-wire feeder. Two hots, a neutral, and a separate equipment grounding conductor.
- Neutral bar isolated from the enclosure. The bonding screw must be removed. This is the single most common subpanel violation.
- Feeder sized under Table 310.16, not 310.12 — unless it carries the entire dwelling load. For 200 A that’s 250 kcmil copper or 350 kcmil aluminium, plus voltage drop on long runs.
A 200 A subpanel fed from a 200 A main is legitimate, since the load calculation — not the breaker arithmetic — governs.
Feed‑through lugs
Some 200 amp panels include feed‑through lugs at the bottom. These are large terminals that allow the main conductors to continue on to another panel. In this way, a single service entrance can feed two panels, such as an indoor panel and a panel in a separate part of the building, without needing a separate meter or disconnect for each one.
Outdoor meter‑main combinations
In some regions, it is common to install a meter‑main combination outside the building. This outdoor unit includes the utility meter and a main breaker (often 200 amps) in one enclosure. From this meter‑main, feeder cables go to one or more indoor subpanels. This configuration can simplify inspection and utility access and may be required by local regulations.
Safety Rules, Compliance, and Good Habits
Working on a 200 amp service is dangerous and should never be done as a DIY experiment. There are several important reasons why this type of work is reserved for licensed professionals.
Licensed electricians only
A 200 amp breaker box, even when the main breaker is off, can still have live parts inside, especially at the main lugs where utility conductors land. These parts are energized whenever the meter is in place, and only the utility can make them safe. Professional electricians are trained to work with such hazards, use the right personal protective equipment, and follow strict lockout/tagout procedures.
Permits and inspections
Permits are not just “paperwork.” They are a formal process to ensure that the design and installation follow the NEC and local rules. After the work is done, an inspector reviews the installation, checks clearances, conductor sizes, breaker types, GFCI/AFCI locations, grounding, and labeling. An inspected and approved 200 amp panel gives confidence to you, to future buyers, and to insurance companies.
Correct torque on all terminations
It is very common to find loose lugs and terminals in older panels. When electrical connections are not torqued to the manufacturer’s specified value, they can loosen over time from thermal expansion and contraction. Loose connections produce heat, cause arcing, and can lead to fires. Modern codes and good practice require that all terminations in a new panel be tightened using torque tools and the printed torque values.
Matching wire size and breaker rating
Every breaker must protect a conductor of the correct size. For example, a 15 amp breaker normally protects 14 AWG copper wire, while a 20 amp breaker protects 12 AWG copper. Using a 30 amp breaker on a 14 AWG wire is extremely dangerous because the wire may overheat before the breaker trips. When upgrading your panel, the electrician will check that each existing circuit is matched to an appropriate breaker size.
Neutral and ground conductors on bus bars
Another detail that is often ignored in old panels is how neutrals and grounds are landed on the bus bars. In most modern panels, the manufacturer allows only one neutral wire under each screw on the neutral bar. Grounds, depending on the bar design, may sometimes be doubled under one screw, but only if the instructions permit it. A clean, correctly terminated bus bar layout is not just a matter of appearance; it directly affects safety and reliability.
Is a 200 Amp Upgrade Right for Your Home?
A 200-amp panel upgrade isn’t just a bigger breaker box. It’s a long-term investment in safety, comfort, and future capacity for things like HVAC, EV charging, and solar (within code and busbar limits). If you’re seeing frequent trips, dimming lights, overheating, or corrosion, or you’re planning major electrical additions, talk to a qualified electrician for a load calculation and a clear written quote. This upgrade helps avoid overloaded-panel risks and prepares your home for the next decades.


Rate this article
Choose a rating from 1 to 5 stars.
No ratings yet