







For your convenience, if you prefer listening, you can listen to the rest of this article via the audio file below.
Why Cutting Wiring Duct Correctly Matters
A clean cut is not cosmetic — it directly affects panel quality and long-term reliability. When you cut wiring duct with a ragged edge, sharp PVC burrs sit right where insulated conductors enter and exit the channel. Over months of vibration and thermal cycling, those burrs slowly abrade insulation and create faults that are hard to diagnose later.
Sloppy cuts also leave visible gaps at joints. Those gaps catch dust, swarf, and stripped insulation, which then drift onto live terminals. Furthermore, a duct cut at a slight angle will not seat flush against DIN rails or enclosure walls, throwing off the entire grid layout.
End cap fitting is the other casualty. End caps are sized to a square profile, so an out-of-square cut either refuses to seat or sits skewed. Therefore, treating the cut as a finished operation — not a rough trim — saves rework and protects every wire that passes through.
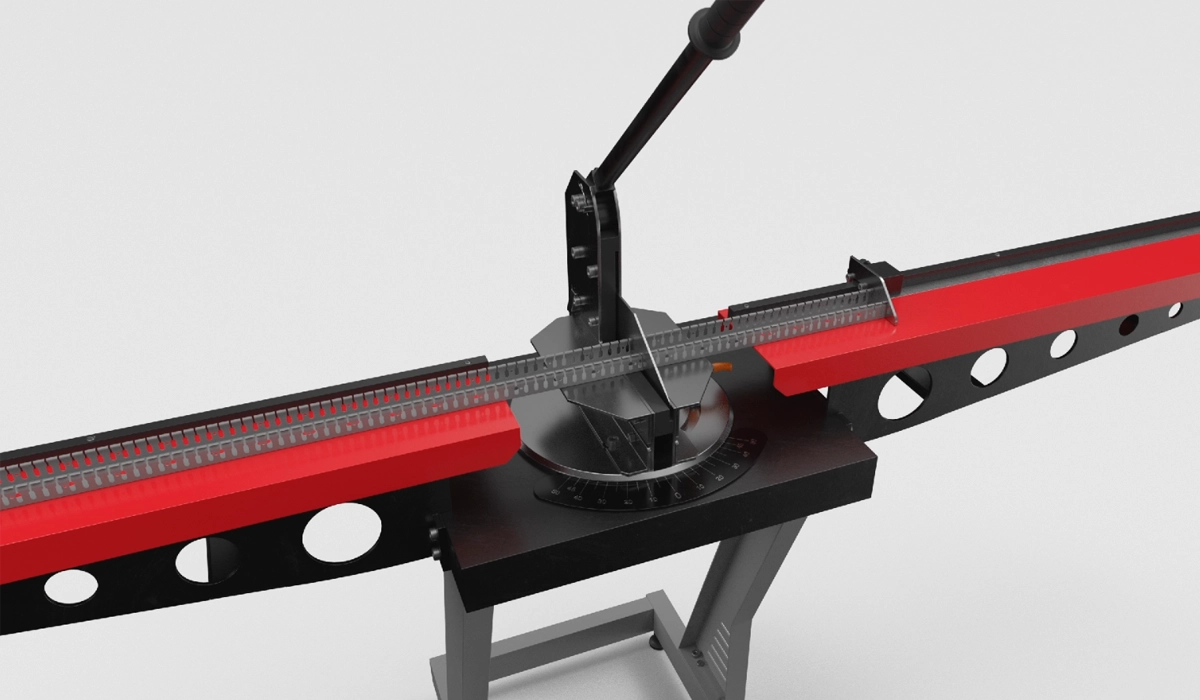
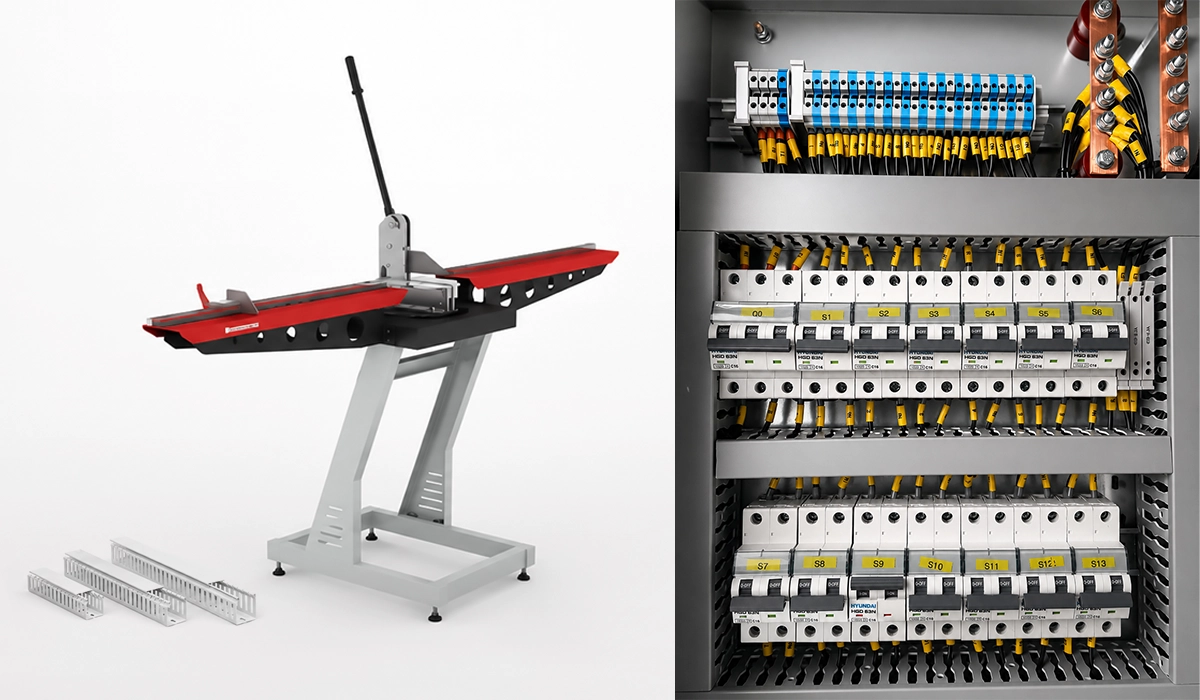
Before we go any further, we recommend getting to know the wiring duct cutter that is built for exactly this job.
Types of Wiring Duct and How Material Affects Cutting
Before choosing a blade, identify the duct profile in front of you. Cutting technique depends heavily on material and wall style. Slotted PVC is the panel-builder’s default, while solid wall, wide-slot, metal, and flexible variants each require a slightly different approach.
PVC dominates because it cuts cleanly, resists most cleaning solvents, and accepts pre-made fittings. Metal raceway, by contrast, demands a proper non-ferrous blade and post-cut deburring. Flexible nylon duct usually needs nothing more than heavy shears.
| Duct Type | Material | Wall Style | Cutting Consideration |
|---|---|---|---|
| Standard Slotted Duct | PVC | Open Slots | Easy to Cut; Slots Can Cause Slight Vibration |
| Solid Wall Duct | PVC | No Slots | Cleanest Cut Surface; Minimal Chipping Risk |
| Wide-Slot Duct | PVC | Large Openings | Similar to Slotted; Watch for Flex During Cutting |
| Metal Wiring Duct | Aluminum / Steel | Varies | Requires a Metal-Cutting Blade; Deburring Is Essential |
| Flexible Duct | Nylon / PE | Corrugated | Cut with Heavy-Duty Scissors or a Utility Knife |
Because rigid PVC accounts for the vast majority of control panel work, the rest of this guide focuses on it. The tools and steps below still apply to metal raceway with the obvious blade swap and a more thorough deburr.
For a full breakdown of each profile and where it is used, read our guide to the types of wiring duct.
Tools for Cutting Wiring Duct
Tool choice depends on volume, accuracy required, and how often you cut. A high-throughput panel shop justifies a dedicated guillotine cutter. Meanwhile, a field technician usually relies on a hacksaw. Below, each option is covered honestly — including where it falls short.
You can find more background information and related technical notes through this reference link.
Miter Saw (Chop Saw)
The miter saw is the fastest, most accurate option for high-volume panel shops. Use a fine-tooth blade — 80 to 100 teeth — designed for plastics or non-ferrous materials. Keep the head locked at 90° for square cuts and run the saw at moderate RPM; excessive speed generates heat and melts PVC. Pair the saw with a stop block when cutting many pieces to identical length.
This source provides further explanation and can help you compare the details more accurately.
Hacksaw or Hand Saw
A hacksaw is the most accessible option — nearly every panel builder owns one. Fit it with an 18–24 TPI blade for PVC duct, mark the cut line clearly, and clamp the workpiece firmly. Apply steady, even strokes; forcing the blade chips the duct wall. Results are acceptable for occasional cuts but always need a finishing pass.
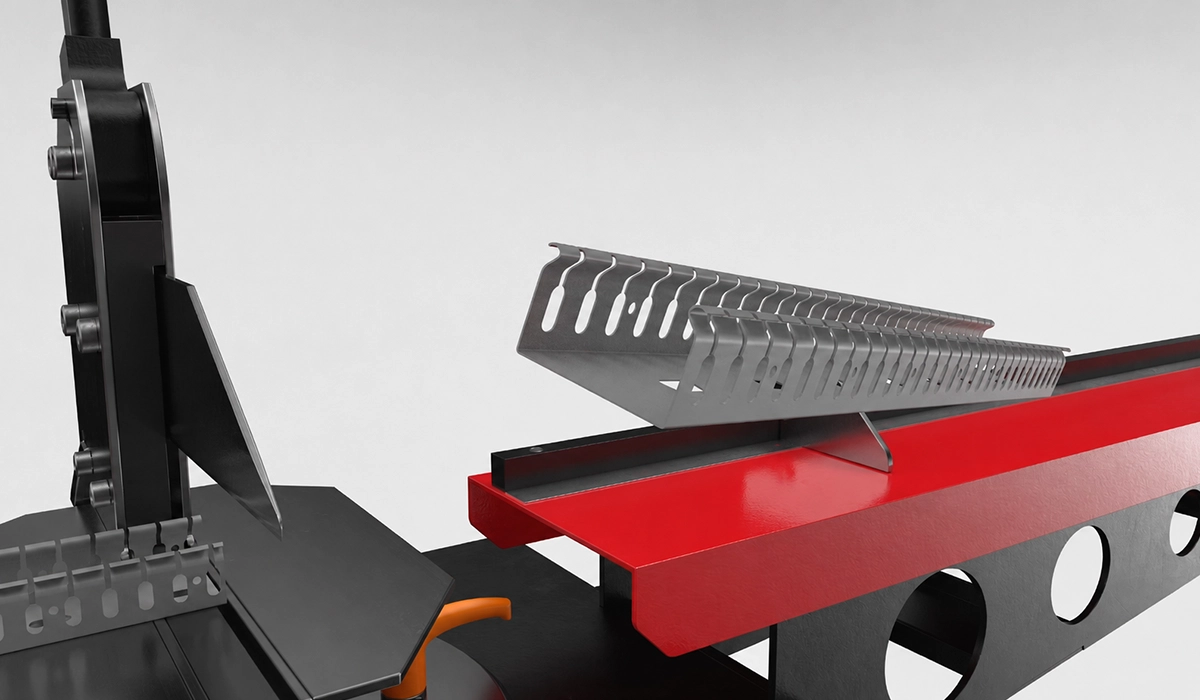
Guillotine-Style Duct Cutter
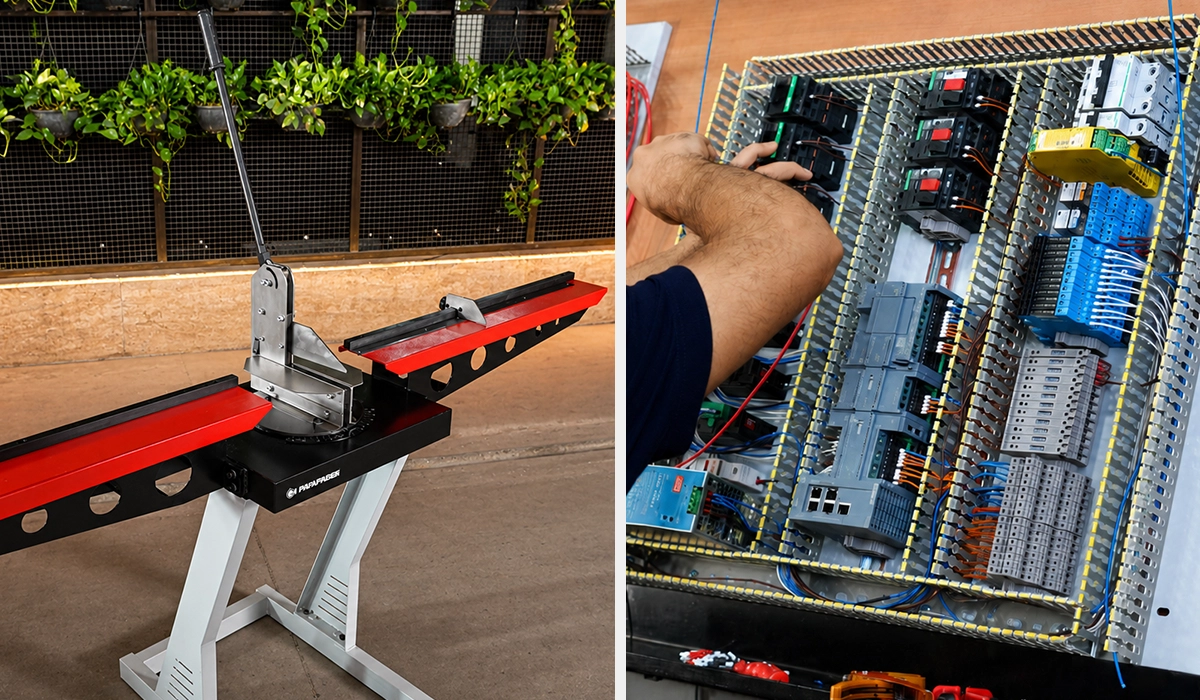
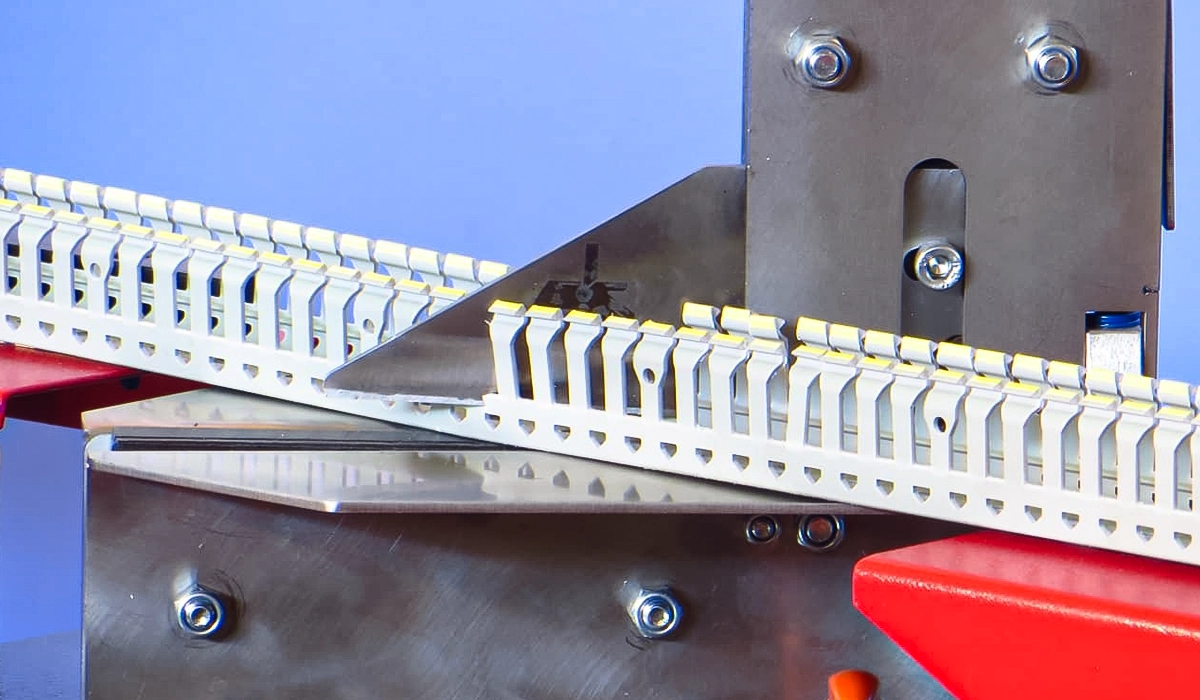
A guillotine cutter delivers a clean, square cut in one motion — no dust, no burrs. It is purpose-built for PVC raceway and slashes cycle time on repetitive cuts. The upfront cost is higher, so it pays back fastest in dedicated panel shops. However, it is not suitable for metal duct.
Utility Knife or Score-and-Snap
Score-and-snap suits only thin-wall or small-profile PVC. Score along a straightedge several times, then snap cleanly. The risk of cracking rises sharply with wall thickness, so reserve this method for emergencies or trim work. For standard wiring duct, choose a saw whenever possible.
If you cut duct every day, a purpose-built wiring duct cutter tool pays back faster than any option in the table above.
| Tool | Cut Quality | Speed | Cost | Best For |
|---|---|---|---|---|
| Miter Saw | Excellent | Very Fast | Medium–High | High-Volume Panel Shops |
| Hacksaw | Good (with Finishing) | Moderate | Low | Field Work, Occasional Cuts |
| Guillotine Cutter | Excellent | Fast | High | Professional Panel Assembly |
| Utility Knife | Fair | Slow | Very Low | Emergency Use / Thin Duct Only |
Step-by-Step: How to Cut Wiring Duct Accurately
Cutting wiring duct to length for control panels is a sequential process. Follow the five steps below and you will get repeatable, square, deburred results — every time.
Step 1 — Measure and Mark. Measure the required length directly inside the panel enclosure when possible. Use a steel rule for accuracy, then mark the cut line on both sides of the duct with a fine marker. For critical fits, mark all four sides. Wiring duct length measurement done sloppily here cannot be fixed downstream.
Step 2 — Secure the Duct. Clamp the piece in a vise or against a workbench fence. For miter-saw work, use the fence plus a stop block when cutting multiples. Movement during cutting is the single biggest cause of angled, ragged edges.
Step 3 — Make the Cut. Apply consistent, moderate pressure. With hand saws, use long, even strokes — short, choppy strokes vibrate the duct and roughen the edge. With a miter saw, lower the blade smoothly through the wall without forcing it.
Step 4 — Deburr and Finish. Run a deburring tool, fine file, or 120–180 grit sandpaper along the fresh edge. This is non-negotiable for metal duct and strongly recommended for PVC. Even a smooth-looking edge can hide micro-burrs that nick insulation.
Step 5 — Test the Fit. Dry-fit the piece before mounting. Check that both ends seat cleanly against adjacent ducts, walls, or end caps. Then make small adjustments before fixing anything permanently.
Download the attached file to explore the complete data and supporting information.
An accurate cut only helps if the duct is the right size, so confirm your duct width and depth before you measure anything.
Common Mistakes When Cutting Wiring Duct (and How to Avoid Them)
Most cutting problems trace back to four recurring errors. Each one is avoidable with a small change in habit.
The first is cutting without securing the duct. A piece held by hand drifts during the stroke and produces angled or ragged edges. Therefore, clamp every workpiece before the blade touches it.
The second is using the wrong blade. A coarse wood-cutting tooth chips and cracks PVC, while a blade with too few teeth generates frictional heat and melts the plastic. Match the blade to the material — 18 to 24 TPI for standard PVC, 80 to 100 teeth on a fine miter blade for power cuts.
Skipping the deburring step is the third. A cut that feels smooth can still carry sharp micro-burrs. Consequently, a quick pass with a file before installation protects insulation for the life of the panel.
Finally, cutting too short ruins the joint. A piece even two to three millimeters short leaves a visible gap and refuses end caps. Measure twice, cut once, and when in doubt, cut slightly long and trim to fit.
Most of these errors simply stop happening once you change tools — these are the wiring duct cutter benefits that matter most in daily work.
Cutting Wiring Duct for Corner and Angle Fits
Internal and external corners come up in larger enclosures and surface-mount runs. In most cases, manufacturer-supplied corner fittings deliver a cleaner, faster, and more professional finish than field-mitered joints. They are also dimensionally consistent across a production batch, which matters for repeat builds.
When a fitting is unavailable, field mitering is the fallback. Set a miter saw to 45° and cut both mating pieces at matching angles. Both faces must meet flush, so test-fit before mounting. A pencil mark on the duct floor helps you keep orientation correct between cuts.
Avoid mitering with a hacksaw if you can — it is difficult to hold a clean 45° angle freehand, even with a guide. For mixed-size joints, double-check that the wall heights match. Sticking with the same manufacturer’s accessories simplifies this enormously and avoids stacking tolerance errors across a run of duct.
Wall style changes how a mitered joint behaves, so compare slotted vs solid duct before you cut any corner.
Safety Tips When Cutting Wiring Duct
Cutting plastic duct is low-risk compared with steel, but a few habits keep it that way. Always wear safety glasses; PVC chips and saw teeth can eject without warning. When you handle freshly cut metal duct, use cut-resistant gloves — the burr on a fresh aluminum or steel edge is sharper than it looks.
Secure work properly before powering up any saw. Never hold duct freehand against a spinning blade, and keep your other hand clear of the cut line. In addition, run miter saws with their factory guards in place at all times.
Dispose of offcuts responsibly. Burning PVC releases hydrogen chloride and other toxic compounds, so route waste to standard plastic recycling or industrial trash. A clean workspace also reduces slip and trip hazards around the cutting station.
The same care applies after the cut — see how to route and mount duct in control panels correctly.
Conclusion about How to Cut Wiring Duct
Learning how to cut wiring duct cleanly takes very little time but pays back across every panel you build. Choose the right tool for your volume, clamp the workpiece, match the blade to the material, and deburr every edge before installation. Stick to manufacturer fittings for corners whenever you can, and treat the cut as a finished operation — not a rough trim. With those habits in place, your enclosures will look professional, fit tightly, and protect wiring for the full-service life of the equipment. The difference between an excellent panel and an average one often lives in details exactly like this.
If any term above was new to you, our guide explains what wiring duct is and how it is specified.



Rate this article
Choose a rating from 1 to 5 stars.
No ratings yet