









If you’d rather listen than read, feel free to play the audio file below for the rest of this article.
What “Cost per Door” Actually Includes
Cost per part sheet metal work means something only once the buckets are defined, and enclosure door production cost has more than most parts.
| Cost Bucket | What Sits Inside It | Usually Under-counted? |
|---|---|---|
| Material | Blank area divided by nesting utilization, at current sheet price | Yes — scrap is invisible in the flat pattern |
| Machine Time | Punch, laser, and press brake cycle minutes at your shop rate | No |
| Touch Labor | Handling, corner work, grinding, and assembly minutes | Yes |
| Consumables | Wire, gas, abrasive discs, tooling wear, and extraction | Yes |
| Finishing | Powder coating, masking, hanging, and curing | No |
| Hardware and Gasket | Hinges, latches, PEM inserts, earth studs, and gasket run | Partly |
| Rework | Every door that does not pass inspection the first time | Almost always |
| Allocated Setup | Programming, tool changes, and first-off setup, divided by batch size | Yes |
Electrical enclosure door fabrication spreads across those eight buckets, and two of them are routinely mis-stated. Quoted material cost hides scrap: the sheet you buy is bigger than the flat pattern you drew. And setup cost per door is not a property of the door at all. It is setup divided by batch, so the same door costs two different amounts on two work orders.
Anyone asking how much does an electrical enclosure door cost to make should treat it as a question about their own route sheet. Write your figures into these buckets as you read.
Where the Money Goes, Step by Step
This follows a typical route sheet for electrical enclosure door fabrication, so you can read it against your own.
Material and Nesting
A door blank is large and rectangular. Good news, because rectangles nest tightly. Bad news, because one poor nest wastes a lot of steel at once.
Material utilization in sheet metal enclosure fabrication commonly runs between 60% and 85%. The gap between those numbers is the whole argument. Gauge choice, standard sheet fit and remnant use all move it.
A 5% utilization gain repeats on every door you make (hypothetical estimate — replace with your nest data).
None of these numbers hold if the machine itself is unreliable. An unplanned breakdown on a corner former, punch, or brake does not just stop that job — it pushes every batch behind it, and the emergency repair costs several times what the same fix would cost on a planned schedule.
Before running the payback arithmetic above, it’s worth reading how predictive maintenance for metalworking machines catches these faults early, since a shop that avoids even one unplanned stoppage a year changes the entire equipment investment case.
Cutting and Punching
A door blank carries lock cut-outs, hinge holes, louvers, a window opening and hardware holes. That feature count decides the process. Laser cutting wins on one-off profiles and complex shapes, where dedicated tooling would never pay back.
The hidden minutes sit in neither. They sit in tool changes, program setup and first-off inspection, and belong to the batch rather than the door.
If you learn better by watching than by reading, this step-by-step tutorial demonstrates the whole process.
corner former Bending
In control panel door manufacturing, a door is usually four flanges plus stiffening returns. The bends themselves are quick.
Cost here is handling and setup, not bending. A large door is a two-person lift, and every tool change between jobs is dead time. Hold one bend radius across a door family and the tooling stays in the machine while the sizes change around it. Bend sequence matters too: a door flipped twice costs handling minutes.
That “no heat” claim is worth unpacking, because it’s the whole reason forming beats welding on a route sheet. The metal is pressed past its yield point at room temperature rather than heated and shaped, so there’s no scale to grind off and no thermal distortion to correct afterward.
If you want the underlying mechanics — plastic deformation, work hardening, springback — before trusting it on a production part, see this guide to cold forming sheet metal.
Corner Joining
Corner joining is the largest single block of touch labor in electrical enclosure door fabrication. Count the traditional sequence as separate operations, not one step: notch, bend, tack weld, weld, grind, polish, inspect — with handling between each.
Seven operations. Seven chances to add minutes, and four are pure labor with no machine doing the work.
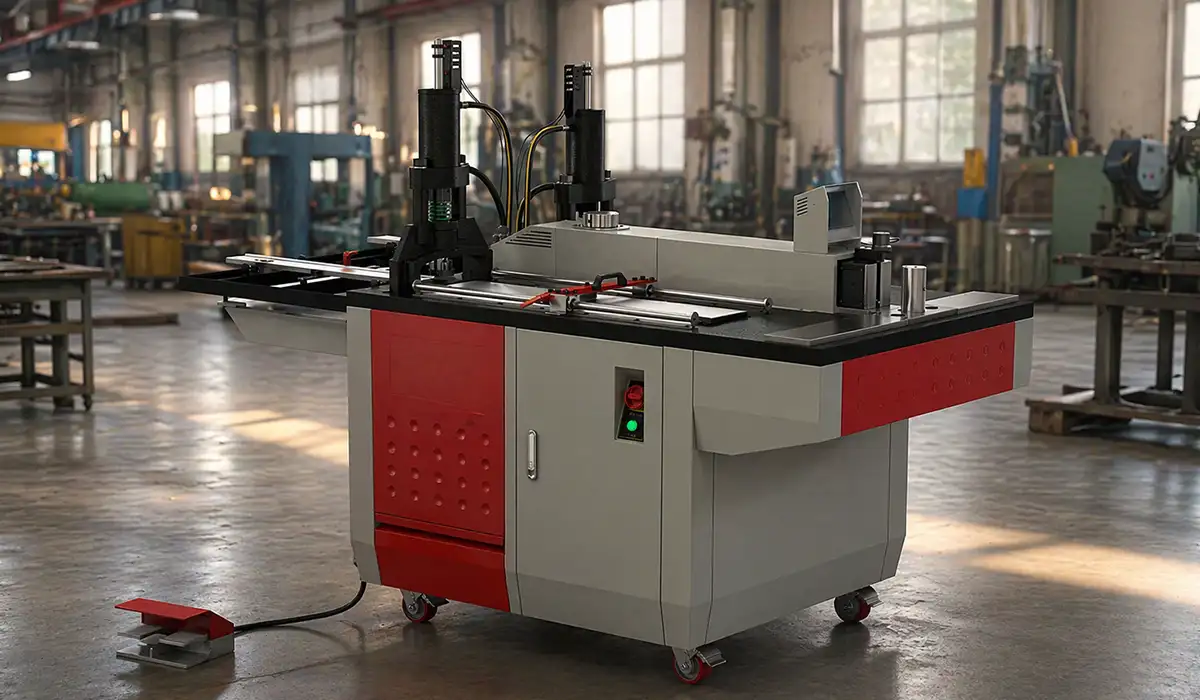
Cold forming with a corner forming machine collapses several of those into one. The blank changes, and so does the operation count. Whether that works for you depends on volume, which Section 5 covers.
None of those cycle-minute numbers hold if the machine itself isn’t running to spec. A turret with worn punches or drifting die clearance doesn’t stop production outright — it quietly adds burrs, rework, and tonnage stress until it does stop. Before you trust your machine-time figures, it’s worth checking them against a proper punching machine maintenance schedule, since worn tooling shows up as touch labor and rework long before it shows up as downtime.
Grinding, Deburring and Finishing Prep
This step is almost pure labor plus consumables: abrasive discs, flap wheels, PPE, extraction, and the time spent changing them.
It rarely appears as its own line in a quote, which is why it is worth timing. Whatever the panel door manufacturing process shows on paper, someone stands at a bench and does this work by hand.
Grinding also creates rework risk on visible surfaces. On stainless or pre-coated material, a heavy hand turns a finishing step into a scrap decision.
For readers who need only the essential points, this short introduction is enough to get started.
Hardware, Gasket and Assembly
Hinges, latches, keeper plates, PEM inserts, earth studs, gasket run. Each is small; together they are a real block of assembly minutes.
Gasket method matters most at volume. Hand-applied die-cut gasket is slower than a dispensed bead, and the gap widens per unit. Where the door belongs to an assembly rated to IEC 61439 or a NEMA Type, as in switchgear door fabrication, the hardware is part of the rating.
Coating
Powder coating cost in cabinet door sheet metal production tracks surface area, color changes and batch size, not door complexity.
The number to watch is rejects. A coating failure sends the door back through stripping and several earlier steps, so it costs far more than its share of the batch. Colour changes are the other hidden line: a short run in a new color carries a full purge.
The Five Levers That Actually Move the Number
Most shops chase material price, but the real sheet metal fabrication cost drivers sit in the labor lines.
Standardize the Door Family
Anyone asking how to reduce sheet metal fabrication cost per part should start with variety, not price.
Fewer gauges. Fewer bend radii. Shared hardware and hole patterns across sizes. Each one removes a tool change, and tool changes are where setup time hides.
The payoff is batching. Standardized doors of different sizes can run together, so setup divides across more units. Even custom electrical enclosure fabrication can share standard features underneath a custom outline.
Standardize the Door Family
Every unique hole size or clearance on a door family means a separate punch and die combination sitting in inventory, and every one of those is a potential tool change mid-batch. The fastest way to see where a family is bleeding setup time is to compare it against the actual punching machine tooling in use across sizes — standardized clearances and shared punch shapes are what let a tool change disappear.
Anyone asking how to reduce sheet metal fabrication cost per part should start with variety, not price.
Design Out Secondary Operations
Design for manufacturability enclosure door work is unglamorous and effective. Standard corner radii. Rectangular openings rather than shaped ones. Adequate spacing between bends and holes.
Published DFM guidance puts the savings in double digits. Test it on your own part first.
Reducing secondary operations in sheet metal is the mechanism. Every feature that avoids a second setup removes handling as well as machine time.
Additional details that go beyond the scope of this page are available on this site.
Take the Weld Out of the Corner
The cost of welding vs forming enclosure corners reads best as an operation count, not a speed comparison.
Forming removes operations rather than accelerating them. No tack. No weld. No grind, no polish. No weld-related rework, and no wire, gas or abrasive consumed by those steps. The minutes do not get faster — they stop existing.
The counterweight is real. Forming needs pre-bent flanges and a dedicated machine, so it needs volume to justify. Section 5 sets out that arithmetic without pretending to know your numbers.
Hold Tolerance to Kill Rework
Rework is invisible in most cost models and large in reality. First-pass yield is the metric that exposes it, because final yield counts a reworked door as a good one.
A door that will not sit flat, or misses the hinge line, gets fixed at the most expensive point in the route: after coating, after assembly, sometimes after delivery.
Fixtures, corner jigs and a go/no-go gauge are cheap stabilizers against an expensive failure.
Get the Batch Size Right
The arithmetic is simple. Setup divides across the batch, so unit cost falls steeply from one door to ten, then flattens.
That curve pushes toward big batches. Inventory and cash tied up in finished doors push back the other way. Faster changeovers move the balance, because a shorter setup makes a smaller batch economic.
There is no universal answer here, only your own trade-off between setup cost and carrying cost.
To see how this works in a real situation rather than in theory, look at this case study.
Build Your Own Cost-per-Door Model
The point of this section is that you fill it in. Every figure is a placeholder until you replace it.
| Cost Line | How to Measure It |
|---|---|
| Material | Blank area ÷ utilization × thickness × density × price per kg |
| Machine Time | Punch, laser, and brake minutes × machine rate |
| Touch Labor | Timed bench minutes × loaded labor rate |
| Consumables | Wire, gas, discs, and tooling wear per door |
| Finishing | Coating charge per door or per square metre |
| Hardware and Gasket | Bought-in cost plus insertion minutes |
| Setup | Setup cost ÷ batch size |
| Rework | (1 − first-pass yield) × average rework cost |
The arithmetic in words: material plus scrap, plus machine minutes at your shop rate, plus touch minutes at your labor rate. Then consumables, setup divided by batch, and a rework allowance taken from your actual first-pass yield rather than your target.
Time the bench steps yourself rather than trusting a standard, because standards drift and benches do not. Then one instruction. Run the model twice — once for your current corner method, once for the alternative — and change only the lines that the method touches. Everything else stays constant, so the difference you see is real rather than assumed. Any example number in a template like this is a (hypothetical estimate), and every one of them should be replaced with your own production data before anybody quotes from it.
When Does Equipment Investment Pay Back?
The framework first. Saving per door multiplied by annual door volume, set against equipment cost plus tooling, training and installation. Divide the second by the first for a simple payback period. It ignores the time value of money, so treat it as a screening number.
Any payback period sheet metal machine investment calculation then moves on five variables:
- Corners per door, and doors per year.
- Your current first-pass yield on welded corners.
- Your loaded labor rate, not the hourly wage.
- Whether the shop is capacity-limited or demand-limited.
- Whether freed welding capacity can be sold, or simply sits idle.
That last one splits the answer. A shop making a few hundred doors a year and one making tens of thousands run identical arithmetic and reach opposite conclusions.
No supplier, PAYAPRESS included, can produce that number without your figures. Any illustrative figure here is a (hypothetical estimate).
The Quality Costs Hiding Inside the Door
Some costs arrive after the door leaves the shop.
A door that fails an IEC 60529 water test goes back for reseal: strip, re-apply, re-test. A coating reject is stripped and re-run. A door that binds on the hinge is reworked on the customer’s line, at their rate. A corner-finish complaint becomes a warranty conversation.
All four trace back to tolerance and process consistency, the same ground as Section 3.4. None appears on a route sheet, and all belong in cost per door.
Track first-pass yield as a cost metric, not only a quality metric. Published estimates put the cost of poor quality in the mid-teens as a share of sale.
Conclusion about Electrical Panel Doors
Work the lines in order of size. Labor-heavy steps first, then rework, then setup, then material. That order surprises most shops, which is the point.
Cost per door is decided by the process route, and the route is chosen long before the first sheet is cut. Electrical enclosure door fabrication is a design decision that happens to finish in a machine.




Rate this article
Choose a rating from 1 to 5 stars.
No ratings yet