



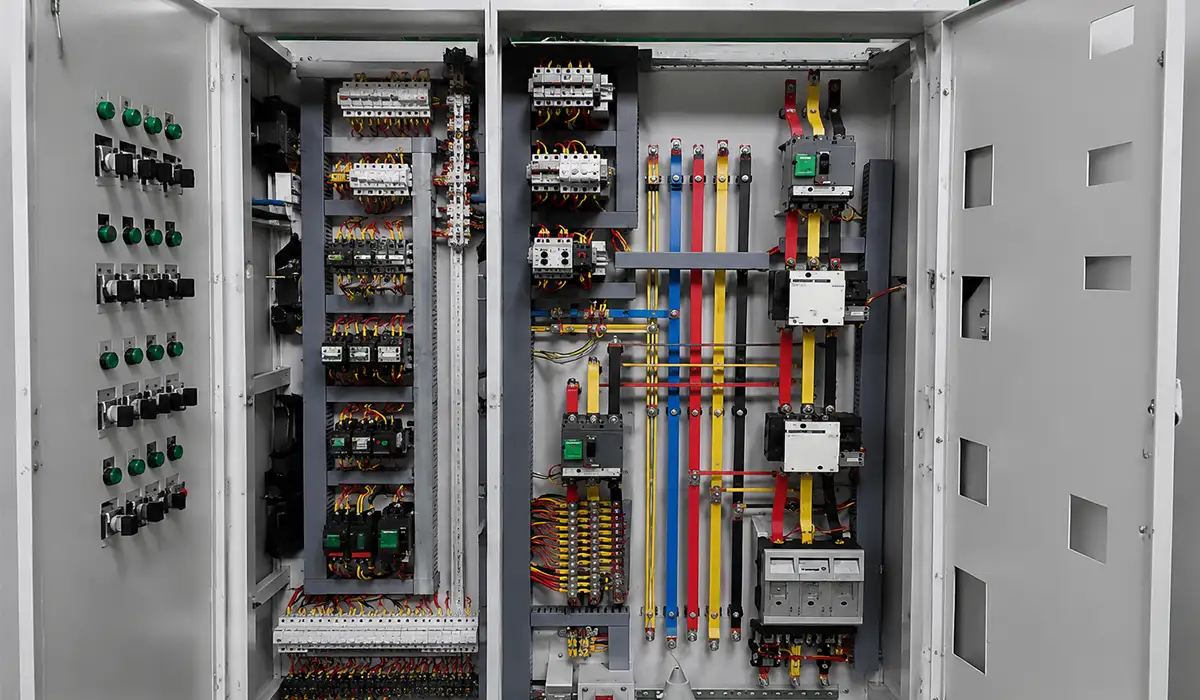





MV Busbar Failure Modes: What Goes Wrong and Why
Get the cross-section or the contact faces wrong, and joint temperature rise climbs past a safe limit. Table 14 of IEC 62271-1 sets 60 K for bare bolted copper connections in air, and 75 K once those faces are silver- or nickel-coated. Past that limit the insulation hardens, cracks, and the joint eventually burns out. Almost every MV busbar failure we see starts here — not in service, but at the desk or the bench, months earlier.
In the field we see five recurring mechanisms. Thermal overload comes from excess current density on an undersized bar. A short-circuit withstand failure follows when the cross-section cannot survive rated Ith and the bar distorts. Inadequate phase clearance invites flashover, worse under pollution. Poorly prepared joints grow resistance, then hotspots. Burrs and oxidation lift the insulation sleeve and concentrate field stress. Each mechanism below ties to its root cause and the decision that prevents it. None are exotic, and all are preventable.
Understanding busbar failure modes in MV switchgear requires familiarity with the standards that govern these systems. A comprehensive overview of the applicable switchgear and busbar standards provides the foundation for preventing the errors described above. For a structured reference, this article on switchgear standards is highly recommended as a starting point.
| Failure mode | Primary cause | Engineering consequence | Prevention |
|---|---|---|---|
| Thermal overload | Undersized cross-section | Insulation failure, joint burnout | Size to temperature rise, then verify ampacity |
| Short-circuit damage | Insufficient Ith rating | Busbar distortion or destruction | Run the Ith calculation; let it govern when larger |
| Arc flash / flashover | Inadequate phase clearance | Panel damage, personnel hazard | Set clearances by rated voltage and pollution degree |
| Joint hotspot | Poor surface prep or torque | Rising resistance, runaway heating | Mechanically clean faces; torque with a calibrated wrench |
| Sleeve adhesion failure | Burrs, surface oxidation | Dielectric breakdown under MV stress | Deburr and clean before applying insulation |
MV Busbar Sizing: Current Density, Material and the Two-Calculation Rule
Keep conductor temperature inside class limits at rated current, measured against the bolted-connection limits in Table 14 of IEC 62271-1. Achieve it by sizing enclosed copper near 1.5–2.0 A/mm², then checking the bar against Ith.
One detail catches out engineers moving across from LV work: MV limits are referenced to a 40 °C ambient, while IEC 61439-1 uses 35 °C for LV assemblies. Comparing the two tables without correcting for that reference will give you the wrong answer.
Two variables dominate: material and cross-section. Electrolytic copper (Cu-ETP, EN 13601, ≥58 MS/m) is the default; it joints reliably and suits silver-plated hardware. Oxygen-free copper (Cu-OF) resists work-hardening in high-cycle duty. Aluminium works where weight or cost rules, but it needs about 1.6× the copper cross-section, bimetallic hardware, and surface prep against galvanic corrosion.
For a more detailed breakdown, download the complete guide here.
Sizing always needs two calculations, not one. The continuous-current check follows current density, ventilation, ambient, and allowable temperature rise. The short-time withstand check sizes the bar for Ith over 1 s or 3 s. In MV, Ith frequently governs.
Here is the most expensive mistake in MV work: engineers carry the LV habit of 3–4 A/mm², size for continuous current alone, then find the bar fails short-circuit withstand. Treating every copper grade as equal compounds it.
Clearance and creepage rise sharply with voltage and pollution degree. Our guide to busbar clearances and creepage distances sets out how those values are derived. and heat-shrink insulation demands burr-free, clean surfaces. Fault forces and thermal cycling load the joints, so support spacing, correct torque, and spring washers remain mandatory.
The engineering variables governing busbar performance in MV switchgear are directly linked to pollution degree and overvoltage category requirements. Selecting the correct clearance and creepage distances depends on understanding these classification concepts thoroughly. This article on pollution degree provides a clear technical explanation of these parameters.
| Bolted Connection, Contact Faces | In Air (Oxidising Gas) | In SF₆ (Non-oxidising Gas) |
|---|---|---|
| Bare Copper or Bare Aluminium Alloy | 60 K | 75 K |
| Silver- or Nickel-coated | 75 K | 75 K |
| Tin-coated | 65 K | 65 K |
Temperature-rise limits from Table 14, IEC 62271-1:2017, referenced to an ambient not exceeding 40 °C. Work from the current licensed edition before applying these to a design.
Material decision matrix — copper vs aluminium busbar
| Driver / condition | Choose copper (Cu-ETP / Cu-OF) | Choose aluminium (e.g. EN AW-1350) |
|---|---|---|
| Compartment space tight | Yes — ~1.6× smaller section | No |
| High fault level / high Ith | Preferred — strength, low creep | Possible, but larger section |
| High duty / heavy thermal cycling | Cu-OF for work-hardening resistance | Riskier at bolted joints |
| Weight or material cost critical | Higher cost and weight | Yes — lighter and cheaper |
| Jointing simplicity | Simplest, standard hardware | Needs bimetallic hardware + anti-oxidant |
Rule of thumb: default to copper for enclosed MV switchgear; consider aluminium only when the bar run is long, weight or budget dominates, and the fault level keeps Ith well inside the larger section’s capability.
Material selection for MV busbars also involves understanding the cable types used to feed the switchgear assembly. Matching the busbar conductor grade to the incoming cable specification ensures consistent thermal and electrical performance across the connection. This article on three phase cable covers the key considerations for power cable selection.
How to Specify and Fabricate MV Switchgear Busbars Correctly
Produce inspection-ready busbars in MV switchgear by running both sizing calculations first, then fabricating to tight tolerance. The proof is cut length within about ±0.5 mm and burr-free faces that pass insulation adhesion.
Start at specification. Define rated voltage, continuous current, Ith with its duration, insulation class, pollution degree, and enclosure type before opening any table. Confirm the governing standard — IEC 62271-200 for metal-enclosed MV assemblies in most markets, the ANSI C37 series for North America.
Next, select material and cross-section. Run both calculations, take the larger result, and name the grade in the purchase order — Cu-ETP or Cu-OF, or EN AW-1350 aluminium where specified. Leaving grade blank invites whatever the supplier has on the shelf.
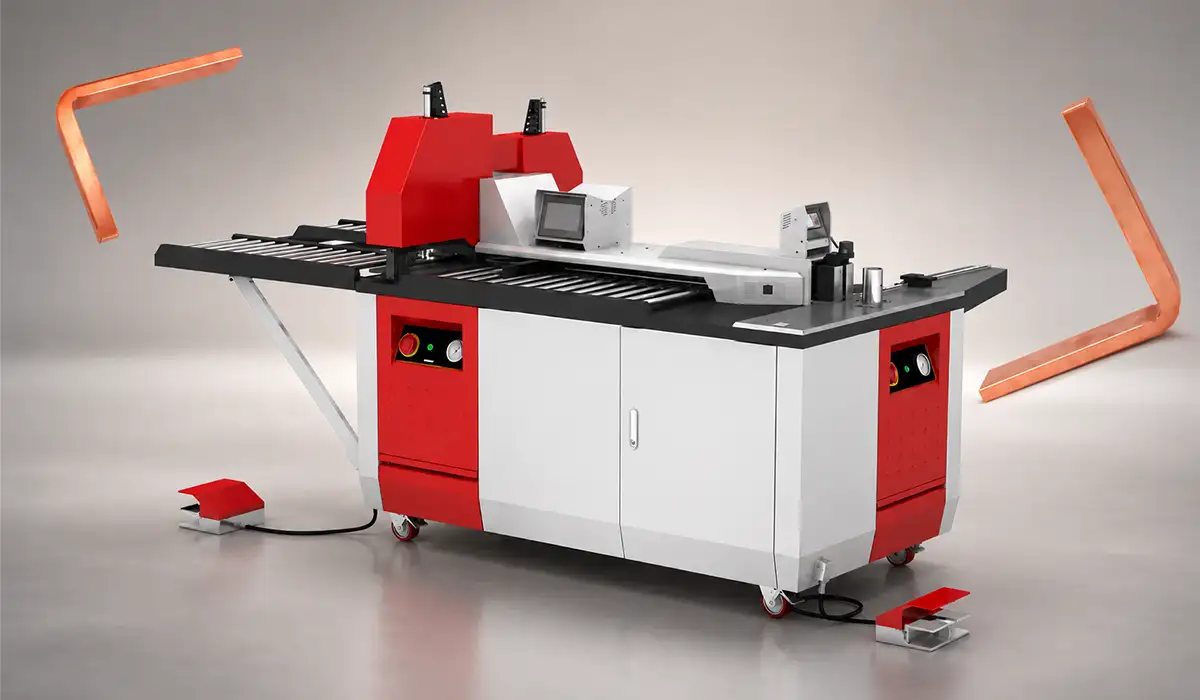
Fabricate with precision. MV tolerances demand exact cut length, accurate hole position for bolted joints, and clean bends without gouging or work-hardening. PAYAPRESS busbar fabrication machines deliver that cutting, punching, and bending accuracy, so panel builders produce surface-clean bars that pass inspection without rework.
Finally, insulate and joint onto deburred, oxide-free faces, torque every bolt with a calibrated wrench, and verify. Measure insulation resistance and joint contact resistance, then record both in the FAT file. Prepare faces immediately before assembly; oxidation reforms in minutes.
Cross-Bolt Torque Pattern for Multi-Bolt Busbar Joints
A busbar joint with four or more bolts must be tightened in a cross pattern, the same way a wheel is fitted — never in sequence around the edge.
The reason is mechanical. Tightening bolts one after another around the perimeter pulls the first corner down while the opposite corner is still loose, so the bar deflects slightly and the contact faces meet at an angle instead of flat. That produces uneven contact pressure across the overlap, and uneven pressure produces a local hot spot at the low-pressure side. The joint may pass a resistance check at commissioning and still run hot in service.
The correct sequence is:
- Fit all bolts finger-tight first, so the faces sit flat before any load is applied.
- Torque diagonally opposite pairs to roughly one-third of the final figure.
- Repeat the same cross sequence at two-thirds.
- Complete the sequence at full torque with a calibrated wrench.
- Re-torque after the joint has been through its first thermal cycles. Bolted copper joints lose a measurable share of their initial tension through stress relaxation, so a re-check after the first period of loaded operation is standard practice on MV assemblies.
On aluminium joints, apply the joint compound immediately after cleaning and use the manufacturer’s reduced torque figure — aluminium creeps under sustained bolt load in a way copper does not.
Accurate hole position is what makes this possible. If holes are punched off-center, the bolts pull the bar sideways as they tighten and no torque pattern can recover a flat contact face. Bend accuracy matters for the same reason; see our copper busbar bending guide.
The Busbar Compartment in MV Switchgear: What Sits Inside It
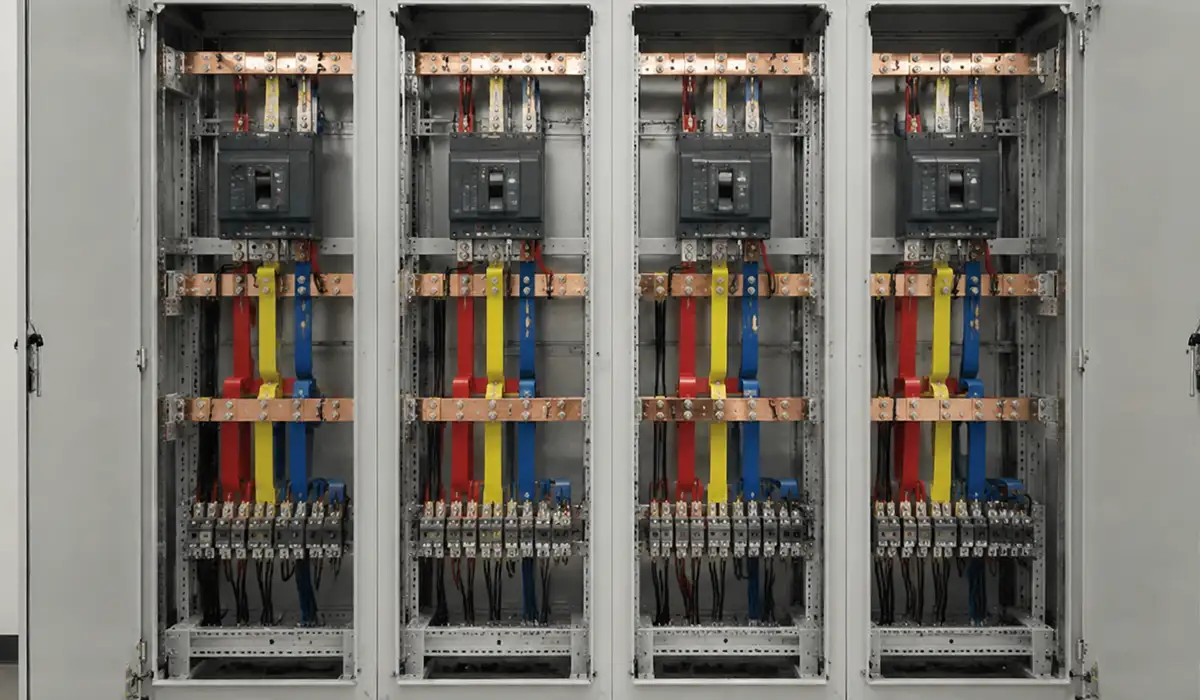
The busbar compartment is the horizontal section that runs across the top or rear of a metal-enclosed panel and carries the main bars from one functional unit to the next. In a compartmented design it is separated from the circuit-breaker and cable compartments by earthed metal partitions, so work can continue in one compartment while the bars stay live.
That separation changes how the bars themselves must be built. Three points matter for the fabricator:
Access is normally tool-based, not interlocked. Manufacturers usually classify the busbar compartment as tool-based access, because it is opened for maintenance or panel extension rather than routine switching. Nothing stops an operator from opening it, so the bars inside must survive being worked around without damage to the insulation.
The bars are often insulated even though they are inside an enclosure. Heat-shrink sleeving or cast resin on the busbar run allows shorter phase spacing, which is what makes a compact 12 kV or 24 kV panel possible in the first place. This is why burr-free edges are not a cosmetic requirement — a burr that lifts the sleeve inside a sealed compartment is not discovered until a partial discharge test or a fault.
Joints inside the compartment are the ones you will revisit. Panel extension, riser connections and unit-to-unit splices all happen here. Hole position accuracy therefore has a longer consequence than a single build: a bar punched off-position forces a field-drilled hole years later, and a field-drilled hole in an MV compartment is a burr and an oxidation problem at the same time.
Where more than one set of busbars is used, each set sits in its own compartment. The partition class and the loss-of-service-continuity category that govern this are set by IEC 62271-200, and we cover those classifications separately in our guide to IEC 62271-200 internal arc, LSC and type tests.
What Precision Fabrication Changes: An MV Busbar Cost Scenario
Consider a modeled 24 kV, 1600 A, 31.5 kA / 1 s copper-busbar feeder. Precision fabrication cut joint temperature rise from +38 K to +16 K above ambient. It also dropped pre-FAT rework from 21% to 4%, driven by the Ith-governed 1000 mm² section and clean, low-resistance joints.
The numbers below are an illustrative engineering scenario, not field test data; treat them as directional. Even so, they match what we observe: uncontrolled processes leave joint contact resistance in the 40–70 μΩ band, while precision-fabricated joints sit near 10–18 μΩ. Lower contact resistance means less heat, and less heat means slower insulation ageing. Note that Ith, not continuous current, sets the 1000 mm² figure here. The rework gap is where the money goes — manual processing pushes pre-FAT rejection up and feeder rework cost with it. Verified contact-resistance and temperature-rise records from your own FAT should replace these figures whenever you have them.
Download this file to keep the key data, tables, and recommendations in one place.
Illustrative scenario — hypothetical values, replace with verified FAT data. 24 kV air-insulated switchgear, 1600 A continuous, 31.5 kA / 1 s, copper busbar.
| Parameter | Uncontrolled process | Precision fabrication |
|---|---|---|
| Cross-section specified | 800 mm² | 1000 mm² (Ith governs) |
| Joint contact resistance (μΩ) | 42–70 | 10–18 |
| Joint temperature rise (K) | +38 above ambient | +16 above ambient |
| Insulation adhesion defects | 14% of joints | <1% of joints |
| Pre-FAT rework rate | 21% | 4% |
| Rework cost per feeder | €2,100 | €280 |
Performance data from MV busbar installations is best interpreted alongside high voltage testing results that confirm insulation integrity before commissioning. Understanding what high voltage tests measure — and how they relate to the contact resistance and temperature rise figures above — gives engineers a complete verification picture. This article on high voltage testing explains the key test methods and acceptance criteria.
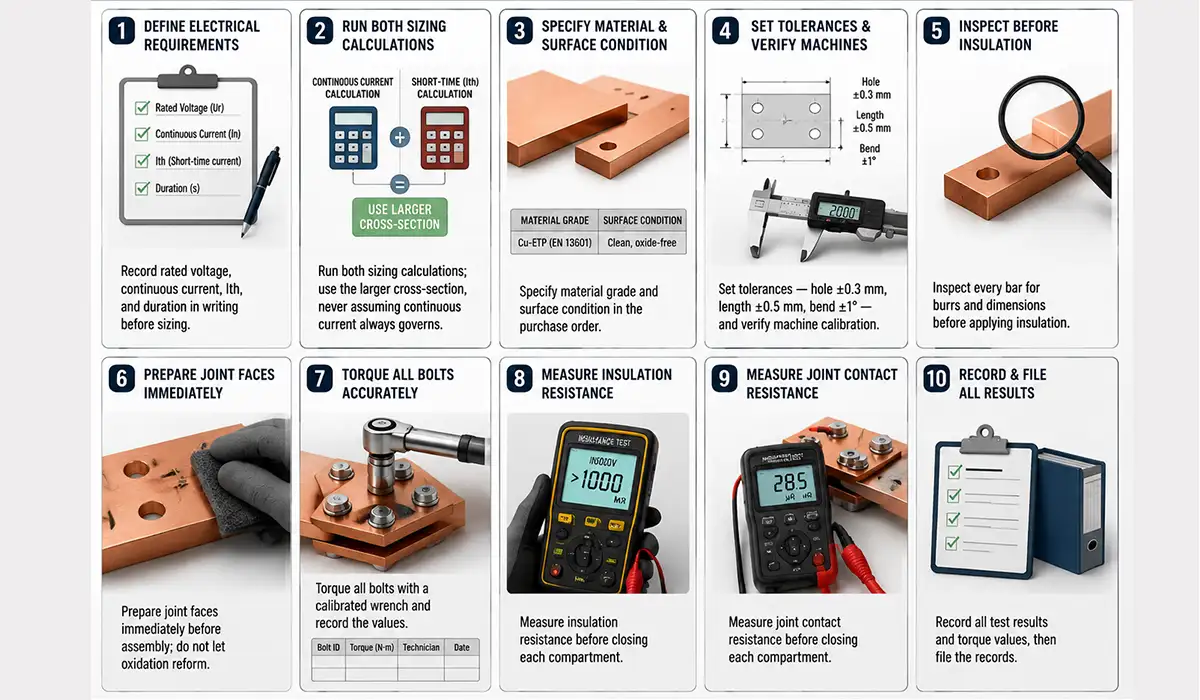
MV Busbar Checklist: 8 Steps From Specification to FAT
Apply correct practice to busbars in MV switchgear and you catch defects at the cheapest point — rejection before insulation costs minutes, after it costs hours.
- Record rated voltage, continuous current, Ith, and duration in writing before sizing.
- Run both sizing calculations; use the larger cross-section, never assuming continuous current always governs.
- Specify material grade and surface condition in the purchase order.
- Set tolerances — hole ±0.3 mm, length ±0.5 mm, bend ±1° — and verify machine calibration.
- Inspect every bar for burrs and dimensions before applying insulation.
- Prepare joint faces immediately before assembly; do not let oxidation reform.
- Torque all bolts with a calibrated wrench and record the values.
- Measure insulation and joint contact resistance before closing each compartment, then file the records.
For engineers and procurement teams, this downloadable file provides a useful reference for decision-making.
Implementing correct MV busbar practice also requires reliable methods for measuring earth resistance at the installation site. Verifying the earthing system before energising the switchgear is a mandatory step in the commissioning sequence. This article on earth resistance covers the main measurement techniques and when to apply each one.
Conclusion: Preventing MV Busbar Failures Before the Panel Ships
Busbar performance is decided before the switchgear ships — at the specification desk and the fabrication machine, not during commissioning. So the failures we have walked through here are preventable, not inevitable. Apply the two-calculation rule, let Ith govern when it is larger, and fabricate to MV tolerances, and you remove most in-service failures before the panel is energised. If your shop needs that dimensional accuracy and surface quality at volume, explore PAYAPRESS busbar fabrication equipment built for MV switchgear production.
Since busbars play a crucial role in the production of MV switchgear, obtaining more information about busbar compliance can be very important and essential for any engineer or fabricator involved in switchgear production.



Rate this article
Choose a rating from 1 to 5 stars.
No ratings yet