






Alternatively, an audio version of this article is available below for your convenience
Copper Busbar Calculator: How the Method Works
Sizing a copper busbar comes down to four equations applied in sequence. Each one feeds the next, and the process reports which of two criteria — continuous current or fault withstand — governs the final selection. The sections below set out every equation, the reference tables behind them, and a full worked example you can check by hand.
Copper Busbar Calculation Formula: The Four Equations
Every copper busbar sizing problem reduces to four equations. Work them in order — each one feeds the next.
| # | What It Answers | Formula |
|---|---|---|
| 1 | How Big Must the Bar Be? | A = Idesign ÷ J |
| 2 | Is My Current Density Sensible? | J = I ÷ A |
| 3 | What Does the Installation Cost Me? | Iderated = Itable × f₁ × f₂ × f₃ |
| 4 | Will It Survive the Fault? | Asc = Isc × √t ÷ k |
Copper Busbar Current Density: A/mm² by Cross-Section
Most guides quote a single current density figure for copper. That is the source of the most common sizing error, because current density is not a constant — it falls as the bar gets bigger.
The reason is geometry. A bar dissipates heat through its surface but generates heat throughout its volume. Double the cross-section and the volume doubles, but the perimeter grows by less than double. So the amps each mm² can carry drops.
Here is what that looks like in practice, derived from the reference table further down this page:
| Cross-Section Band | Open Air (A/mm²) | Enclosed (A/mm²) |
|---|---|---|
| 60–200 mm² (Small Bars) | 2.6 – 3.7 | 1.9 – 2.8 |
| 250–500 mm² (Medium) | 2.2 – 2.5 | 1.6 – 1.9 |
| 800–1600 mm² (Large) | 1.7 – 2.0 | 1.3 – 1.5 |
How to use this correctly:
- Use current density as a screening check, never as the final method. Divide your load current by your chosen cross-section and see whether the answer falls in the band above.
- If your result sits above the band, the bar will run hot — go up a size.
- If it sits well below, you are wasting copper.
- Then confirm against the ampacity table, because the table already accounts for the geometry that a single density figure cannot.
A worked check. A 100 × 10 mm bar (1000 mm²) carrying 1400 A in an enclosure gives J = 1.4 A/mm². That sits inside the 1.3–1.5 band for large bars in an enclosure, so the selection is sound. The same 1.4 A/mm² on a 40 × 5 mm bar would be far below its 1.9–2.8 band—badly oversized.
Short-Circuit Withstand Formula and the k Factor
The adiabatic method assumes the fault is over before any heat escapes the conductor, which is valid for clearing times up to about five seconds:
A_sc (mm²) = I_sc (A) × √t (s) ÷ k
The k factor is not a single number. It depends on the temperature the conductor starts at and the temperature you are willing to let it reach:
k = 226 × √( ln[ (θ_f + 234.5) ÷ (θ_i + 234.5) ] )
where 226 is the copper material constant, θ_i is the starting temperature, and θ_f is the permitted final temperature.
| Start → End Temperature | k Value | When It Applies |
|---|---|---|
| 70 → 160 °C | 115 | Copper with PVC insulation in contact |
| 30 → 160 °C | 143 | Copper with XLPE-class insulation |
| 20 → 200 °C | 165 | Bare Copper Busbar, Typical Switchgear Default |
| 90 → 250 °C | 143 | Copper at elevated operating temperature |
Worked example. A 50 kA fault cleared in 1 second, bare copper busbar, 20 °C initial, 200 °C limit:
A_sc = 50,000 × √1 ÷ 165 = 303 mm²
Compare this against the cross-section from the continuous-current calculation. The larger of the two governs. If continuous current demanded 500 mm², that value governs and fault withstand is already satisfied.
⚠️ Do not use 226 directly as k. It is the material constant that goes inside the logarithm, not the answer. Using it as k implies letting the conductor reach roughly 457 °C — well past the point where copper anneals and any adjacent insulation or support is destroyed. It will undersize the bar by about a third.
What Is a Copper Busbar and Why Does Correct Calculating Matter?
A copper busbar is a rigid, flat or shaped electrical conductor manufactured from high-conductivity (HC) copper — typically conforming to BS EN 13601 — used to collect, distribute, and transmit large currents within switchgear panels, distribution boards, substations, and industrial power distribution systems. Unlike flexible cables, a copper flat bar conductor provides a low-impedance, high-current-density power path in a mechanically stable, space-efficient form that suits the construction requirements of enclosed switchgear assemblies.
Correct sizing is not optional. An undersized busbar operates above its thermal rating, causing the conductor temperature to rise beyond safe limits, degrading adjacent insulation materials, increasing contact resistance at bolted or compressed joints, and creating conditions for fire, nuisance tripping, or complete equipment failure. An oversized busbar, in contrast, wastes copper material, increases enclosure weight and structural cost, and provides no operational benefit beyond the current-carrying margin the application actually requires.
Proper busbar design rests on four interdependent pillars, each addressed in full within this guide: continuous current capacity (ampacity), temperature rise verification, derating for real installation conditions, and short circuit withstand rating. No single calculation is sufficient in isolation — all four criteria must be satisfied simultaneously for a compliant, reliable design.
Copper busbar sizing is one part of a much broader subject covering how electrical busbars are designed and applied across modern facilities. Understanding the full range of busbar types, design considerations, and applications gives useful context before working through sizing calculations in detail. For a comprehensive overview, this article on electrical busbars is highly recommended as a starting point.
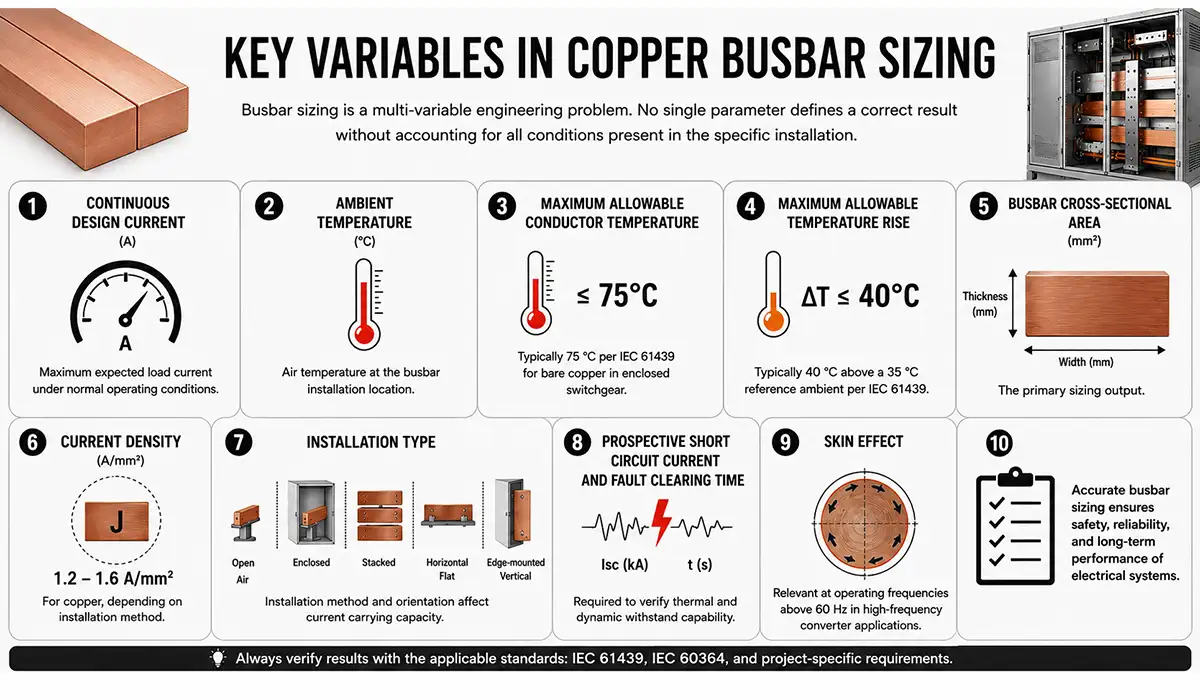
Key Variables in Copper Busbar Calculating
Busbar sizing is a multi-variable engineering problem. No single parameter defines a correct result without accounting for all conditions present in the specific installation. Before performing any calculation with a bus bar sizing calculator or by hand, an engineer must establish the following input values:
- Continuous design current (A) — maximum expected load current under normal operating conditions
- Ambient temperature (°C) — air temperature at the busbar installation location
- House design target — many panel builders design to 30–40 K rise for lower losses and slower insulation ageing. This is a design choice, not a standards requirement
- Maximum allowable temperature rise — IEC 61439-1 Table 6 names 70 K for terminals intended for external conductors. Busbars have no single numeric cap in the standard; most manufacturers work to 70 K, giving roughly 105 °C at a 35 °C reference ambient
- Busbar cross-sectional area (mm²) — the primary sizing output
- Current density (A/mm²) — 1.3 to 3.7 for copper, falling as cross-section rises. See the density band table below
- Installation type — open air, enclosed, stacked, horizontal flat or edge-mounted vertical orientation
- Prospective short circuit current (kA) and fault clearing time (seconds)
- Skin effect — relevant at operating frequencies above 60 Hz in high-frequency converter applications
These variables interact strongly. Enclosing a busbar in a non-ventilated panel reduces its current carrying capacity by up to 20% compared to its open-air rating regardless of cross-sectional area — the thermal environment alone governs the outcome. Stacking multiple copper conductor bars in close proximity raises mutual temperature between adjacent conductors, reducing each bar’s individual capacity further. Correctly identifying every applicable condition at the outset of design prevents the sizing errors most commonly encountered in switchgear manufacture and panel building.
The variables that govern copper busbar sizing are closely tied to the broader principles covered in dedicated busbar sizing guidance, which walks through how temperature rise, current density, and the rated diversity factor interact in practice. This article on busbar sizing provides a useful complementary reference.
How to Size a Copper Busbar in 5 Steps (Worked Example)
This section presents the complete manual calculation process for sizing a copper busbar for a defined application.an interactive copper bus bar calculator is embedded on this page, it automates all five steps described below — enter your design parameters and the tool returns the required cross-sectional area, derating-adjusted current rating, and short circuit withstand cross-section in a single operation.
The process follows five sequential steps: establishing the design current with safety margin, selecting current density and calculating cross-section, applying derating factors, verifying temperature rise, and confirming short circuit withstand. Each step builds directly on the result of the previous one. No step may be skipped without risk of producing an unsafe or non-compliant busbar design.
To explore the topic in greater depth, review the information available on this website.
Manual sizing calculations like the ones in this section can be significantly streamlined using dedicated busbar design software that automates current density, derating, and temperature rise calculations together. Using the right software tools reduces the risk of arithmetic errors on complex multi-factor projects. This article on busbar design software provides a practical overview.
Step 1 — Establish the Design Current and Safety Margin
The design current is the maximum continuous current the busbar must carry under normal operating conditions, incorporating a protective safety margin. A 125% continuous-load margin is standard practice, and is required by NEC Articles 210.19 and 215.2 in North America. If a connected load draws 640 A continuously, the design current for busbar sizing purposes is:
640 A × 1.25 = 800 A
This uprated figure is the sole input to all subsequent steps. Using the raw load current without the safety margin is a common and consequential error in routine design work.
Step 2 — Select Current Density and Calculate Cross-Sectional Area
The primary sizing formula for busbar cross section area is:
Cross-Sectional Area (mm²) = Design Current (A) ÷ Current Density (A/mm²)
Take the current density from the band that matches your expected cross-section (see the density table above). For a design current around 800 A, the answer will land in the 250–500 mm² medium band: 2.2–2.5 A/mm² in open air, 1.6–1.9 A/mm² enclosed.
Open air: 800 ÷ 2.3 ≈ 350 mm² → nearest standard profile above is 60 × 6 mm (360 mm²).
Verify against Table 1: 60 × 6 is rated 830 A in open air. Confirmed.
Enclosed: 800 ÷ 1.7 ≈ 470 mm² → nearest standard profile above is 80 × 6 mm (480 mm²).
Verify against Table 1: 80 × 6 is rated 790 A enclosed — 10 A short of the design current. Step up to 80 × 10 mm (800 mm², rated 1190 A enclosed).
That second case is exactly why the density screen never replaces the table. The formula said 470 mm² was enough; the table showed the nearest standard profile falls just short, and the correct answer is one size larger.
Once a cross-sectional area is calculated, the resulting busbar profile must still be physically arranged within the panel in a way that supports correct phase spacing and clearances. Reviewing common busbar arrangements helps engineers translate a calculated cross-section into a practical, code-compliant layout. This guide on busbar arrangements is a useful reference.
Step 3 — Apply Derating Factors for Installation Conditions
After establishing the base cross-section, derating factors must be applied for elevated ambient temperature, enclosure type, busbar stacking, and mounting orientation. Derating factors are multiplicative — all applicable factors must be combined. A busbar installed in a 50 °C ambient, non-ventilated enclosure, stacked in pairs, carries a combined derating of:
0.88 (50 °C ambient) × 0.80 (non-ventilated enclosed) × 0.90 (two stacked) = 0.634
This means the selected busbar must have an open-air rating approximately 58% greater than the nominal design current to remain within safe thermal limits under those specific installation conditions. Refer to the full derating table in the following section for all correction factors.
For the latest available details, check the official page directly.
Derating for enclosed and stacked installations is closely related to the clearance requirements that govern how busbars are spaced within a panel. Insufficient clearance can compound the thermal effects of stacking described in this step. This article on busbar clearances explains these requirements in detail.
Step 4 — Verify Temperature Rise
After selecting a busbar size, the engineer must confirm that the temperature rise at the design current does not exceed IEC 61439 limits—IEC 61439-1 Table 6 names 70 K for terminals intended for external conductors. For the busbars themselves it gives no single numeric cap — the limit is set by conductor strength, the insulation in contact, and the effect on adjacent equipment. Most manufacturers work to 70 K, giving about 105 °C at a 35 °C reference ambient. Tighter house targets of 30–40 K are a design choice, not a standards requirement.
Temperature rise verification is one of the core requirements addressed by the broader busbar selection guidance used for LV panels, which ties together ampacity, temperature rise, and standards compliance into a single selection workflow. This article on busbar selection provides a useful complementary reference.
Step 5—Calculate Short Circuit Withstand
Apply the adiabatic formula from the equations section above:
A_sc = I_sc × √t ÷ k
Using the 50 kA / 1 second example with a bare copper busbar (20 → 200 °C, k = 165):
A_sc = 50,000 × √1 ÷ 165 = 303 mm²
Compare this against the cross-section from Steps 2 and 3. The larger of the two governs the final selection. In the enclosed worked example above, the continuous-current requirement of 800 mm² exceeds 303 mm², so the thermal criterion governs and fault withstand is already satisfied.
If the fault calculation had returned the larger figure, it would override the ampacity result and the bar would need to be uprated accordingly.
Copper Busbar Current Carrying Capacity Chart: Size, Rating, and Weight
The values in the table below apply to bright bare copper, horizontal flat orientation, 35 °C ambient, still air, calculated in accordance with IEC 60287 methodology. These are reference ratings only. Derating must be applied for any deviation from these baseline conditions — including elevated ambient temperature, enclosed installation, stacked conductors, or non-horizontal orientation. Consult the derating table in the following section to adjust these figures for project-specific conditions. For copper busbar current carrying capacity per mm² in other configurations, apply the relevant correction factors from Table 2 before finalizing any busbar selection.
Table 1: Copper Busbar Current Carrying Capacity — Reference Values (Bright bare copper | Horizontal flat | 35 °C ambient | Still air | IEC 60287 methodology)
| Busbar Size (mm) | Cross-Section (mm²) | Open Air Rating (A) | Enclosed Rating (A) | Weight (kg/m) |
|---|---|---|---|---|
| 20 × 3 | 60 | 220 | 165 | 0.53 |
| 25 × 5 | 125 | 355 | 265 | 1.11 |
| 30 × 5 | 150 | 410 | 310 | 1.34 |
| 40 × 5 | 200 | 520 | 390 | 1.78 |
| 50 × 5 | 250 | 630 | 475 | 2.23 |
| 60 × 6 | 360 | 830 | 625 | 3.21 |
| 80 × 6 | 480 | 1,050 | 790 | 4.27 |
| 80 × 10 | 800 | 1,580 | 1,190 | 7.12 |
| 100 × 10 | 1,000 | 1,900 | 1,430 | 8.90 |
| 120 × 10 | 1,200 | 2,200 | 1,650 | 10.68 |
| 160 × 10 | 1,600 | 2,750 | 2,065 | 14.24 |
For the full set of ampacity tables at multiple temperature rises, plus stacked-bar factors, see our copper busbar current ratings guide.
The enclosed column in this chart uses a factor of 0.75 against the open-air value. Table 2 lists 0.80 for a non-ventilated enclosure and 0.90 for a ventilated one; 0.75 represents a sealed enclosure with no ventilation and no forced air. Use 0.75 where the panel is fully sealed, 0.80 where it is closed but not sealed, and 0.90 where it is actively ventilated.
The ampacity values in Table 1 represent only one part of overall busbar pricing and selection considerations, since larger cross-sections directly affect material cost and procurement budgets. Comparing busbar prices alongside ampacity tables helps teams balance technical and budget requirements early in the design process. This article on busbar prices offers a useful overview.
Copper Flat, Copper Strip, or Copper Bar — the Same Product
The same rectangular conductor is sold under several names, and the ratings in the chart above apply to all of them:
| Term | Where You’ll See It |
|---|---|
| Copper Busbar / Bus Bar | Switchgear and panel-building specifications |
| Copper Flat / Copper Flat Bar | Indian and Middle East procurement |
| Copper Strip | Metal stockists and mill certificates |
| Copper Bar | General trade usage |
| Copper Busbar Profile | Manufacturer dimension charts |
On dimensions. Sizes are written width × thickness, in millimeters — so 100 × 10 means 100 mm wide and 10 mm thick. The larger figure is often called the height of the bar, because in most switchgear the bar is mounted edgewise with that dimension vertical. Edgewise mounting is worth about a 5% uprating, since convection runs along the full face.
Standard thicknesses are 3, 5, 6, 8, 10, and 12 mm. Standard widths run from 12 mm to 200 mm. Bars thicker than about 12 mm are avoided in LV work, because the extra copper sits in the middle where it neither cools well nor carries its full share of current at 50/60 Hz.
Copper Busbar Density: Mass Density vs Current Density
“Density” means two completely different things in busbar work, and the two are often confused in the same conversation.
| Mass Density | Current Density | |
|---|---|---|
| Symbol | ρ | J |
| Units | g/cm³ or kg/m³ | A/mm² |
| Copper Value | 8.9 g/cm³ (8900 kg/m³) | 1.3–3.7, depending on size and mounting |
| Aluminium Value | 2.7 g/cm³ | 0.8–1.0 |
| Used For | Weight, freight, support loading, price per metre | Sizing, thermal screening |
Mass density in practice. Weight per metre = cross-section (mm²) × 0.0089. A 100 × 10 mm bar is 1000 × 0.0089 = 8.9 kg/m. Over a 12 metre run that is 107 kg per phase — which drives support bracket spacing, enclosure structure, and shipping cost.
Current density in practice. See the A/mm² bands in the formula section above. Use it as a screening check, never as the final method.
A note on “IACS”. In copper specifications, IACS stands for the International Annealed Copper Standard — the reference scale where pure annealed copper is defined as 100% conductivity. Aluminium sits at about 61% IACS. This is unrelated to the International Association of Classification Societies, which uses the same acronym in maritime standards.
Busbar Derating Factors: Ambient, Enclosure, Stacking, and Orientation
Derating is the process of reducing a conductor’s published current rating to account for installation conditions that impair its ability to dissipate heat. The reference ampacity values in Table 1 assume a specific set of ideal baseline conditions — bare copper, horizontal flat mounting, 35 °C ambient, still air, no adjacent conductors. Any deviation from these conditions reduces the busbar’s effective thermal capacity, requiring selection of a larger cross-section to carry the same current safely within temperature limits. Busbar ampacity derating factors are not optional adjustments — they are a mandatory component of any compliant sizing calculation.
Failing to derate correctly is one of the most common and consequential errors in busbar system design. An enclosed, stacked conductor arrangement in a 50 °C ambient environment can require a conductor with an open-air rating more than twice the nominal design current to remain within the applicable temperature-rise limit under continuous load. The following table presents the individual correction factors to be applied for each relevant condition.
To explore the topic in greater depth, review the information available on this website.
Table 2: Busbar Correction Factors — Derating and Uprating
| Derating (Reduces Capacity) | Factor |
|---|---|
| Ambient 40 / 45 / 50 / 60 °C | 0.97 / 0.93 / 0.88 / 0.77 |
| Sealed Enclosure, No Ventilation | 0.75 |
| Non-ventilated Enclosed | 0.80 |
| Ventilated Enclosed | 0.90 |
| Two / Three / Four Bars Stacked | 0.90 / 0.80 / 0.73 |
| Uprating (Increases Capacity) | Factor |
|---|---|
| Edge-mounted (Vertical Flat Orientation) | 1.05 |
| Black Painted Surface Finish | 1.08 |
When multiple derating conditions apply simultaneously—for example, elevated ambient combined with a non-ventilated enclosed installation and stacked conductors—all applicable factors must be multiplied together to produce the final combined correction multiplier. Applying factors individually without combining them is a systematic error that consistently produces unsafe designs. The Step 3 worked example demonstrates the correct multi-factor multiplication method.
Derating for enclosed and stacked busbars is also closely linked to how busbars are installed within LV panels, where enclosure ventilation and conductor spacing are largely fixed by the panel design itself. Understanding how busbars behave inside LV panels provides useful context for applying these derating factors correctly. This article on LV panel busbars is a recommended resource.
Copper Busbar Sizing for Three-Phase Power Systems
Three-phase busbar system design follows the same fundamental methodology as single-phase sizing—current density, cross-section calculation, derating, temperature verification, and short circuit withstand. Flat-mounted three-phase configurations with touching conductors generate greater inter-phase thermal interaction than edge-mounted arrangements, where natural convection along the full face height of each bar provides additional cooling and allows a 5% uprating (factor 1.05 per Table 2).
Neutral Busbar Sizing for Harmonic Loads
Neutral busbar sizing depends on load balance and the harmonic content of connected loads. For balanced three-phase loads with low harmonic distortion, the neutral conductor may be sized at 50% of the phase cross-section. However, for circuits supplying non-linear loads — variable speed drives, UPS systems, data centre power distribution with switch-mode power supplies, or large rectifier banks — significant triplen harmonic currents accumulate in the neutral and do not cancel at the star point. In these applications, the neutral busbar must be sized at 100% of the phase cross-section to prevent overheating under asymmetric harmonic loading. This is a copper vs aluminum agnostic requirement that applies regardless of conductor material.
Earth and protective conductor (PE) busbars are sized at a minimum of 50% of the phase cross-section, unless fault current calculations for the specific installation require a larger section. Panel builders and switchgear manufacturers should verify this figure against the prospective earth fault current and protective device clearing time using the same IEC 60865-1 adiabatic formula that governs phase busbar short circuit withstand calculations.
Three-phase busbar sizing decisions are also influenced by how the busbars are physically arranged across single or double busbar schemes, which affects phase spacing, mutual heating, and overall system redundancy. A technical comparison of these schemes is available in this article on busbar schemes.
Copper vs Aluminum Busbars — Current Capacity and Practical Comparison
Engineers designing power distribution systems regularly face a material selection decision between copper and aluminum busbars, driven by differences in electrical conductivity, weight, installed cost, and jointing requirements. This is a genuine design decision with direct implications for busbar cross-section, enclosure dimensions, support bracket spacing, and long-term maintenance requirements — not simply a procurement preference. The copper busbar current rating per mm² advantage over aluminum is approximately 1.5 to 1.6 times, meaning an equivalent aluminium cross-section must be roughly 60% larger for the same current rating at the same temperature rise.
Table 3: Copper vs Aluminum Busbar — Engineering Comparison
| Property | Copper Busbar | Aluminum Busbar |
|---|---|---|
| Electrical Conductivity | 100% IACS | ~61% IACS |
| Typical Current Density | 1.3–2.5 A/mm² | 0.8–1.0 A/mm² |
| Density | 8.9 g/cm³ | 2.7 g/cm³ |
| Thermal Conductivity | 401 W/m·K | 237 W/m·K |
| Cross-Section Needed vs Copper | 1× (reference) | ~1.6× larger |
| Jointing Method | Standard bolted or compression | Requires anti-oxidant compound |
| Relative Weight per Unit Length | Heavier | ~65% lighter |
| Cost per kg | Higher | Lower |
| Cost per Unit Ampacity | Comparable | Comparable to slightly higher |
| Preferred Application | High-density, confined, critical | Weight-sensitive, large-format runs |
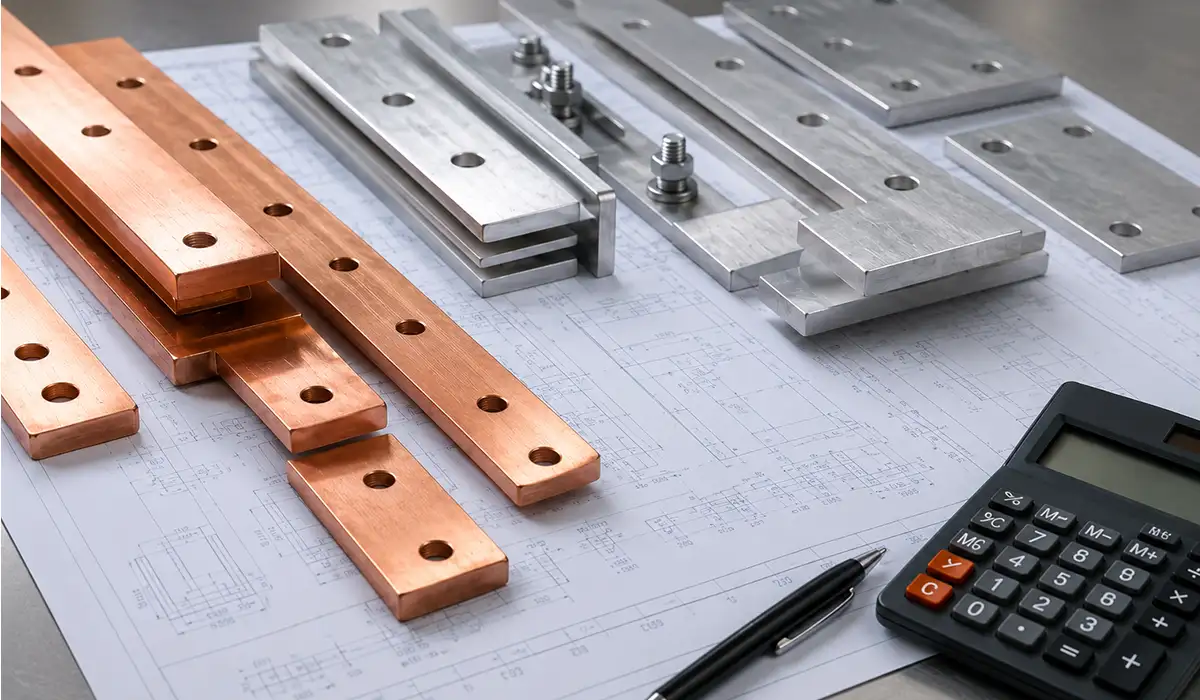
Copper remains the preferred conductor material for high-current-density, space-constrained, and high-reliability environments — including enclosed switchgear panels, motor control centers, and industrial distribution boards where physical dimensions, joint integrity, and long-term reliability are critical. Aluminum offers weight and initial cost advantages in large-format busbar trunking systems and outdoor switchyard applications, but demands careful management of bi-metallic contact corrosion wherever aluminium conductors connect to copper terminals, and requires anti-oxidant joint compound at every connection.
Where weight and flexibility outweigh the conductivity advantage of copper, flexible busbar solutions offer an alternative worth considering for both copper and aluminum applications. Reviewing the available flexible busbar types and their sizing standards can help when a project’s constraints favor a different conductor format. This article on flexible busbar types provides a useful comparison.
Applicable Standards for Copper Busbar Sizing and Installation
IEC 60287 is the foundational standard for current-carrying capacity calculations, providing the complete thermal methodology for establishing continuous current ratings based on conductor material properties, installation environment, and heat dissipation conditions. It forms the computational basis for the ampacity values and derating methodology presented throughout this guide and should be the primary reference for any engineer performing first-principles busbar thermal calculations outside the scope of standard manufacturer tables.
IEC 61439 series governs low-voltage switchgear and controlgear assemblies and defines temperature rise limits, test verification methods, and performance requirements applicable to busbar systems within enclosed equipment. Table 6 of IEC 61439-1 names 70 K for terminals intended for external conductors; for the busbars themselves it sets no single numeric cap, deferring instead to conductor strength, the insulation in contact with the bar, and the effect on adjacent equipment. Compliance with IEC 61439 is mandatory for switchgear manufacturers supplying equipment to European and international markets.
IEC 60865-1 provides the calculation methods for determining the thermal and mechanical effects of short circuit currents on busbars and their support structures, including the adiabatic formula used in Step 5 of the sizing process. This standard governs both the minimum cross-section required for fault withstand and the mechanical forces imposed on busbar support insulators under peak fault current conditions. On the North American side, NEC Article 408 defines requirements for switchboards, switchgear, and panelboards — covering busbar material specifications, minimum sizing, current ratings, and insulation requirements applicable to installations within US jurisdiction. NEMA standards complement UL 891 for dead-front switchboard construction, addressing conductor sizing and assembly requirements within the US regulatory framework. Engineers must identify which standard framework governs their specific project jurisdiction at the outset and ensure all calculations, reference tables, material specifications, and installation practices align consistently with that framework throughout the entire design process.
This reference page is useful for readers who want to study the topic beyond this article.
The standards referenced throughout this guide are part of a wider set of busbar standards that engineers should be familiar with when working across different jurisdictions and equipment types. This article on busbar standards provides a comprehensive overview.
Conclusion about Copper Busbar Calculator
Correct copper busbar sizing is essential for safe, efficient, and compliant power distribution. A properly selected busbar must satisfy continuous current capacity, temperature rise limits, derating requirements, and short circuit withstand criteria at the same time. Relying on current rating alone can lead to overheating, insulation damage, joint failure, or unnecessary material cost. By applying the correct design current, selecting an appropriate current density, adjusting for real installation conditions, and verifying performance against IEC or applicable local standards, engineers and panel builders can ensure that the final busbar system delivers reliable long-term operation under both normal load and fault conditions.
Since busbars play a crucial role in the production of electrical panels, obtaining more information about copper busbar bending can be very important and essential for engineers who size busbars and then need to fabricate them to fit real enclosure geometries.


Rate this article
Choose a rating from 1 to 5 stars.
No ratings yet